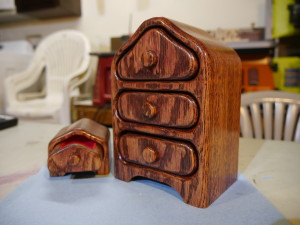
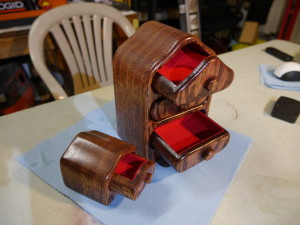
A while back when I got my bandsaw, I made several projects with it and one of those first projects was a bandsaw box. Everyone that seen these little creations loved them and they became an instant hit with family and friends. The reason they’re called bandsaw boxes is because you start out with a block of wood, and you make all the cuts with a bandsaw. Out of the same block of wood will come out the body, each of the individual drawers and even the drawer handles. In this article I will show you how to make a bandsaw box. You can read this article for step by step instructions and you can also watch the included video for additional visual help.
This will be a general guide to making a bandsaw box. Dimensions will not be included because I will leave that up to you. Using your creativity you can come up with any design and the resaw capacity on your bandsaw will also determine the maximum dimensions of your bandsaw box. I highly suggest to take a look at the resaw capacity of your bandsaw and accommodate the proportions of your bandsaw box accordingly. Make sure the width of your box (side to side measurement) and the depth of box (front to back measurment) will not be greater than your bandsaws resaw capacity. Most 14″ bandsaws have a 6″ resaw capacity or more depending on model and if they have riser blocks included. Smaller bandsaws will have smaller resaw capacities. The height of the box doesn’t matter as much but you are limited to the distance between your bandsaw blade and the frame to the left side. In most cases you will never need to go that big so I wouldn’t worry about height too much.
To get started, you will need:
- Block of wood (you can stack several pieces together to form a block if you don’t have access to larger thicknesses) any wood will work, hardwoods are better although some stain better than others
- Bandsaw
- oscillating sander
- Belt sander
- clamps
- random orbit sander (optional)
- router + table + roundover bit (optional)
- Table saw (optional to cut out sections of boards to make a block)
- Wood files
- chisel
- sand paper 80, 150, 220 grits (higher grit if you plan on staining)
- foam brushes
- wood glue (choose a stainable glue if you will stain the bandsaw box)
- wood finish (I used wipe on poly and boiled linseed oil)
- wood stain (optional)
- shop towels
- vinyl or nitrile powder free disposable gloves (nitrile is better) avoid using latex gloves
- suede like interior lining (optional) either self adhesive felt (I used this for this project) or flocking fibers + adhesive + mini flocker
- paste wax (optional)
STEP ONE – Making the block of wood (if you have a block of wood, skip to step 5)
Cut out several equal sized sections from a board. You can use your bandsaw for this step but a table saw is your best option.
STEP TWO
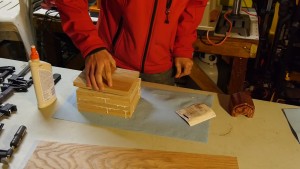
Glue the boards together. Apply glue on one side and spread the glue evenly, then stack another board on top. Repeat until you have all boards stacked.
STEP THREE
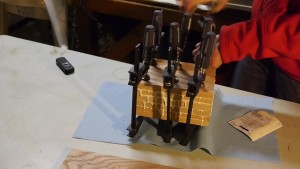 Clamp them down. Use several clamps for this step to apply pressure evenly. Tighten the clamps as tight as possible. As the boards are being clamped, they will slide around. As you are clamping, adjust the boards after sliding to keep them aligned as best as possible. TIP – place the first clamp and apply little pressure, then place the next clamp with little pressure as well and repeat until all clamps are in place. Then tighten each clamp a little at a time evenly until they’re clamped tightly. Plenty of glue will run down the sides, don’t worry about this and you don’t need to clean this up as the ends will be cut down later.
STEP FOUR
Let the glue dry and set completely. Read the glue bottle instructions for appropriate drying times. Remove clamps when the glue has set completely.
STEP FIVE
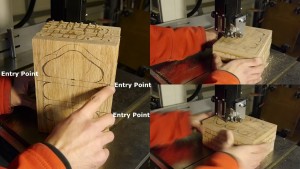
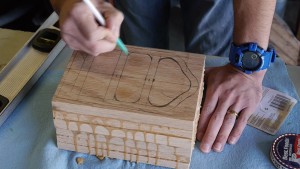 Draw the design for your bandsaw box. You can make any shape for the exterior and it needs to have drawers to put junk inside. When designing the drawers, keep in mind that a bandsaw cannot cut sharp corners so design the drawers with round corners. Also keep in mind the radius of any curves. The tighter curves are, the more difficult they will be to cut in one pass and tighter curves require thinner bandsaw blades. In my bandsaw box I based my curve radius’s for use with a 1/4″ blade. I could have went with tighter curves but that would have required thinned blades. Keep this in mind when designing your bandsaw box. Also since the drawers will be cut out with a bandsaw, there is no way to get the blade to cut only the drawer, so we need to start our cuts for the drawers from the outside of the frame. Mark a line on the frame of the bandsaw box as an entry point to start your cut for the drawers. Refer to the video if none of this makes sense. Also, if you have 2 or more drawers, make sure to keep the entry points evenly on both sides of the box. This is because you lose a tiny bit of height from the side frame of the box with each entry point cut. If all the entry points are on the same side, there will be a noticeable loss of height on that side and your box will be uneven.
STEP SIX
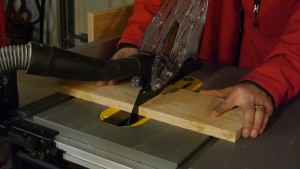
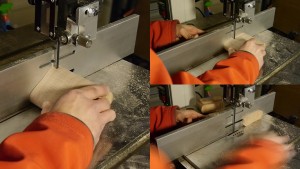
Make the first cut. The first cut will be removing a thin layer from the backside of the bandsaw box. You don’t want this cut to be too thin or too thick. If it’s too thin it becomes fragile, if it’s too thick you waste interior space for drawers. Use your bandsaw with a fence attached and make this cut. This cut must be straight and that is why the fence is needed. After making the cut, the smaller piece is the backside of your bandsaw box. Put it away for now.
STEP SEVEN
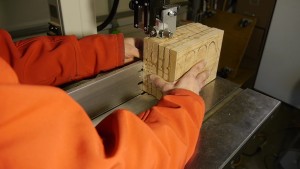
The next set of cuts will be to cut out each individual drawer. This is the trickiest part of the whole build so take your time and be careful. You only get one try on this, literally! If you screw up here, you just wasted a perfectly good block of wood and have to start over from scratch. Take your time and don’t rush through these cuts. A tip for cutting curves is to turn the block as you push towards the blade. If you turn only without moving the block towards the blade, the blade will deflect.
STEP EIGHT
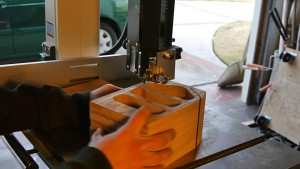
After the drawers are cut out, we need to hollow them out. Using your bandsaw with the fence installed, we will cut out the front and backs of each drawer just like we did with the backside cut of the bandsaw.
STEP NINE
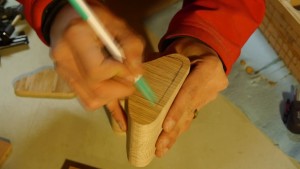
After that were left with the middle section of the drawers, this is the part that’s going to be hollowed out. First put your drawers back together and remove the front section, then with a pencil were going to mark the bottom and sides of the drawer, which is one piece. The middle top section is all waste and this is the part were going to remove. Repeat this step and mark the other drawers.
STEP TEN
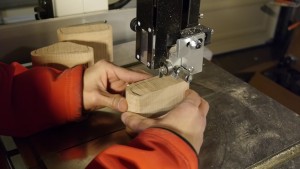
Then take those pieces over to the bandsaw and cut along the line where we just marked each drawer. Now we’ve hollowed out each drawer piece.
STEP ELEVEN
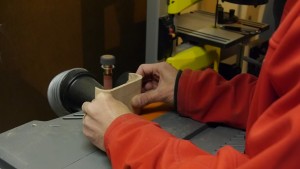
Before we put the drawers back together, take the drawer bottoms over to the oscillating sander and sand only the interior of these pieces, not the outer section, were going to sand the outer section later after we’ve assembled each drawer.
STEP TWELVE
Then gather all of your drawers and glue them up together. Use clamps to hold them in place. After you clamped them, there’s gonna be a bit of glue squeeze out. Leave the glue alone and let the glue set for about 10 minutes, then scrape out the glue on the inside of the drawers.
STEP THIRTEEN
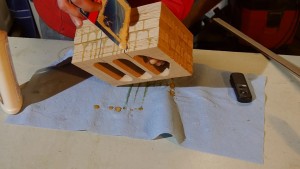 Now its time to glue up the frame of the bandsaw box. Before we can attach the backside, we have to first close up the side openings of the frame. This is the tricky part because you have to get glue up in those thin gaps. I used a thin piece of cardboard and applied glue on that, then you have to spread the gaps to get the glue in there. Make sure to get as much glue in there as possible. Once everything is glued up, use clamps and make sure to tighten them as tight as possible. The tighter the clamps are, the less noticeable these gaps will be. Make sure to get rid of any glue squeeze out from the interior of the drawers. Don’t worry about the glue squeeze out on the exterior on the frame. Then let everything dry completely.
STEP FOURTEEN
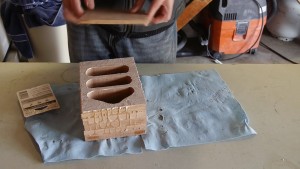 The next step is to attach the backside of the bandsaw box frame, make sure there’s no left over glue on the backside of the bandsaw box frame, if there is- now’s the time to remove it. Then place some glue on the back and spread it around evenly, place the back of the box over it and make sure that it lines up, and then clamp it in place. When you clamp it, it’s extremely important that the 2 pieces don’t slide from each other, so make sure that they stay in place when clamping. Then let the bandsaw box frame dry completely.
STEP FIFTEEN
After the drawers have dried completely, use a chisel to scrape away the dried glue squeeze out from the bottom and sides of each drawer.
STEP SIXTEEN
Then sand the bottom and sides of each drawer
STEP SEVENTEEN
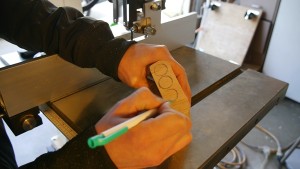
Then using the leftover piece of the core of one of the drawers, were going to make some drawer handles. I chose to make round handles but, you can make them square, triangles or whatever. Draw out the shapes first, then cut the whole section as a layer with the bandsaw, and then cut them out individually also with the bandsaw.
STEP EIGHTEEN
Then take the drawer handles over to the sander to refine their shapes, I used the sander to finish and round over the initial shape, and then to round over the edges. Then finish them off by sanding them by hand with sandpaper. Start off with 80 grit, then move up to 150, and then 220 grit.
STEP NINETEEN
Once the glue has completely dried on the bandsaw box, remove the clamps and cut out the exterior shape of the box using the bandsaw.
STEP TWENTY
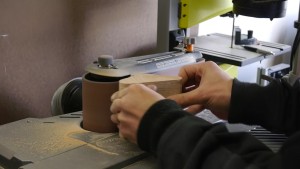
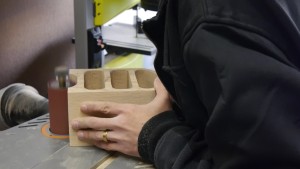
Then take your bandsaw box over to the sander and refine the final shape you just cut out. Use the oscillating sander for inside curves and a belt sander for outside curves and straight panels.
STEP TWENTY-ONE
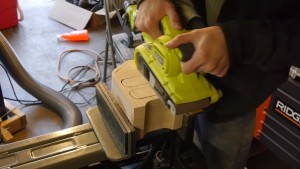
After sanding the final shape of the bandsaw box, place the drawers inside the box and notice that they are sunken in. This is because we cut out 2 layers from each drawer when we cut the front and back of each drawer. To fix this, we’re going to use a belt sander on the front while the drawers are inside to even out the frontside of the frame so it’s flush with the drawers.
STEP TWENTY-TWO
Then sand all the sides of the box including the drawers with 150 grit sandpaper. A random orbit sander helps out greatly but you can do this by hand if you don’t have one.
STEP TWENTY-THREE
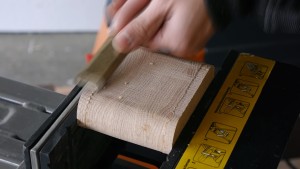
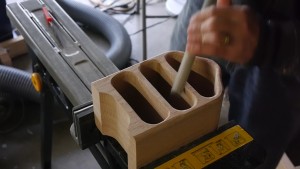
The next step is to round over the front and back edges of the bandsaw box including the drawer openings and the fronts of the drawers. To do this we’re going to have to do a ton of manual labor with a file. If your box is big enough you can use a router attached to a router table and round out the edges with a 1/4″ roundover bit. This is only if your box is big enough, if it’s small you may be able to use a 1/8″ roundover bit, otherwise stick to rounding out the edges with a file.
STEP TWENTY-FOUR
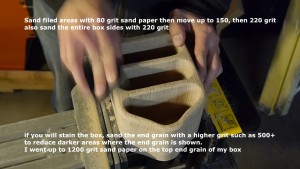
Sand over all the filed edges by hand with 80 grit paper, then move up to 150 grit, then on to 220 grit. After the edges are sanded, do the final sanding of all outer sides with 220 grit. If you plan on staining the bandsaw box, sand any exposed end grain with higher grit. This is so that the stain color is even when staining – otherwise the endgrain will soak up more color than the rest of the box. The end grain on my box was on top and I sanded it up to 1200 grit and as you can tell it is hard to notice a variation in color tone after the whole box was stained.
STEP TWENTY-FIVE
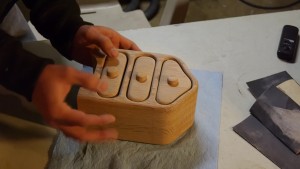
After the final sanding, dab a bit of glue on the backside of each drawer handle and place them centered on the front of each drawer. You can use clamps to hold them in place although I didn’t feel this was necessary plus the clamps tend to make the drawer handles slide so I simply placed the handles on to each drawer and pressed them in place. Wait a few minutes (about 10 minutes) for the glue sqeeze out to dry a bit and then scrape it out. Wait for the glue to dry completely before finishing.
STEP TWENTY-SIX
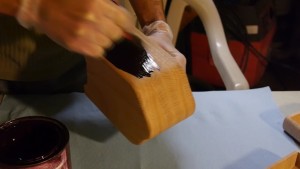
Apply stain if you want to add color to your box. If not skip over to the last step of sealing the box. You can apply the stain with a foam brush or with a towel. If you want a deep dark color, soak the bandsaw box with stain using a foam brush and let it sit for several minutes. The longer it sits the darker the color. Then wipe off with a towel. If you want a lighter color, wipe on the stain evenly with a towel and wipe it off quickly with a clean towel. Wait for the stain to dry completely and is no longer tacky before applying the finish.
STEP TWENTY-SEVEN
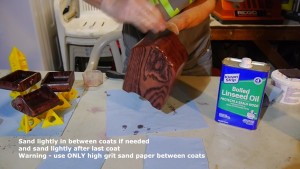 Now we’re going to seal and protect the box with a wood finish. There’s many different finish choices out there but I like using wipe on poly so I’ll base these instructions on that. Wipe on poly is an easy to apply polyurethane finish that is long lasting and offers great protection for wood. I also like using boiled linseed oil as it makes the color of the wood “pop”. You don’t have to use boiled linseed oil if you choose not to but I like how it enhances the color of the wood. On the first coat of finish I mix one part wipe on poly with one part boiled linseed oil. Apply the finish with a foam brush and let everything soak it in for 10 minutes. Then using a lightly moistened towel with the finish, wipe the excess finish on the entire surface. As you wipe, make sure to move only with the grain. Then let the finish dry completely before adding a second coat.
On the second and following coats, use only wipe on poly. Apply it like the first coat with a foam brush, and with lightly moistened shop towel with wipe on poly, wipe the excess finish from the box. Repeat this step to add additional coats. Sand any bumps and nubs lightly if needed with high grit sandpaper in between coats. I used 1000 grit sandpaper to smooth out bumps but make sure to sand very lightly. If you do need to sand, wait till the after the second coat to sand if needed. If you sand after only applying one coat you run the risk of sanding away the stain if you stained your bandsaw box. Depending on the thickness of each coat you may need 4-6 coats. After the final coat of wipe on poly lightly sand any bumps if needed.
STEP TWENTY-EIGHT
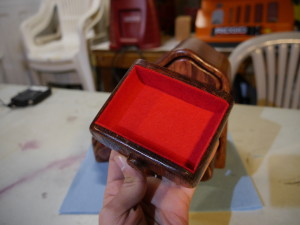
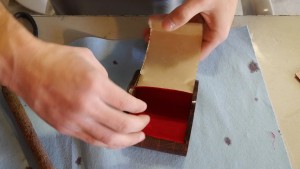 You’re almost done but if you want to make you bandsaw box even better, you can add some suede-like material to the inside of the drawers. For this step I used self adhesive felt that I simply cut out and placed inside each drawer. Alternatively, you can step up to better interior linings with the premium feel of flocking fibers. Lining your drawers with flocking fibers is more costly and more effort but is definitely worth it in the end with it’s premium feel. If you go this route, you will need flocking fibers, adhesive, and an applicator. Use tape and mask around the drawer opening, then with a brush apply the adhesive which is a form of glue. Wait till it’s tacky and using the flocking fiber applicator (mini flocker) pump the mini flocker to apply the flocking fibers onto the drawer. Remove excess flocking fibers by flipping the drawers upside down and remove the tape. Then let them dry completely before use.
STEP TWENTY-NINE
To finish the box, wipe on some paste wax with a towel to the bandsaw box including the exterior of each drawer, wait a few minutes till it dries to a haze and buff away with a clean towel. Make sure to wax inside the bandsaw box openings where the drawers go into so the glide when you open and close the drawers. The wax adds another layer of protection over the wipe on poly, brings some shine, and helps lubricate the drawers.


irealy like the way you explane thing keep up the good work…….
Thanks! I’m glad my article and video helped you out
do you have a printable patterns i just bought a sketch book from local dollar store going to try to make my own desighn
This is great! Why didn’t I check it out before? lol.
Thanks Glenn, I also have a how to guide on making a sweet mobile tool base here on the website. You can also find a how to build a computer guide and install an over the range microwave guide on my YouTube channel.
You did excellent on this bandsaw box. Lot’s of explanations. Would have like to seen you flock it for sure. Maybe you can do a special video on flocking one?