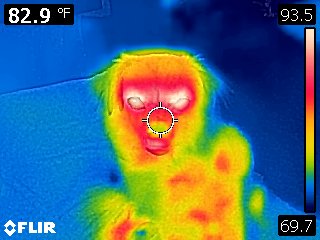
 Flir the company known for their thermal imaging products was kind enough to send me one of their C2 thermal imagers for review. Unlike non-contact thermometers (which is what I’ve been using before the C2), thermal imagers have special infrared cameras that can view the radiation from heat and display variances of heat on a display. Warmer areas within the view of the camera will stand out compared to cooler areas. Probably one of the most famous example of using a thermal imager is from the original Predator movie. Remember how the Predator alien would view the jungle landscape while wearing his mask? He would see a rainbow of colors, particularly some blues, reds, greens, and yellows, but he didn’t just see our world in a different color scheme. His mask was a thermal imager and could view the differences in temperatures in the environment and this was particularly helpful with tracking and spotting life forms. Particularly warm blooded life forms with their heat radiation was a huge contrasts to the much cooler background. Also remember when Arnold was covered in mud and the Predator could not spot him? That’s because his body heat was not being exposed to the thermal imager since his body heat was being covered by mud with a cooler temperature.
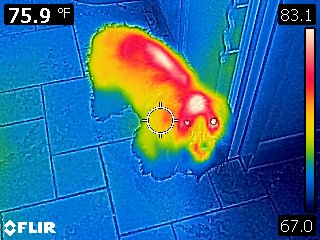
Thermal imagers serve many important functions. They can spot warm blooded creatures such as humans and animals, even when it’s dark and no visible light is available. This makes them great for use in the military, could be used for hunting, have great uses for firefighters, in the medical field, and even have many great uses around the home. Thermal imagers can be of great help for HVAC installers and homeowners looking for energy losses in heating/cooling ducts, poor ventilation, and inefficiencies. They’re also great for electricians troubleshooting electrical panels. There are loads of products that Flir sell that could help you. For example, you could also take a look at the Flir TG 165 to give you a better comparison of what products on are offer.
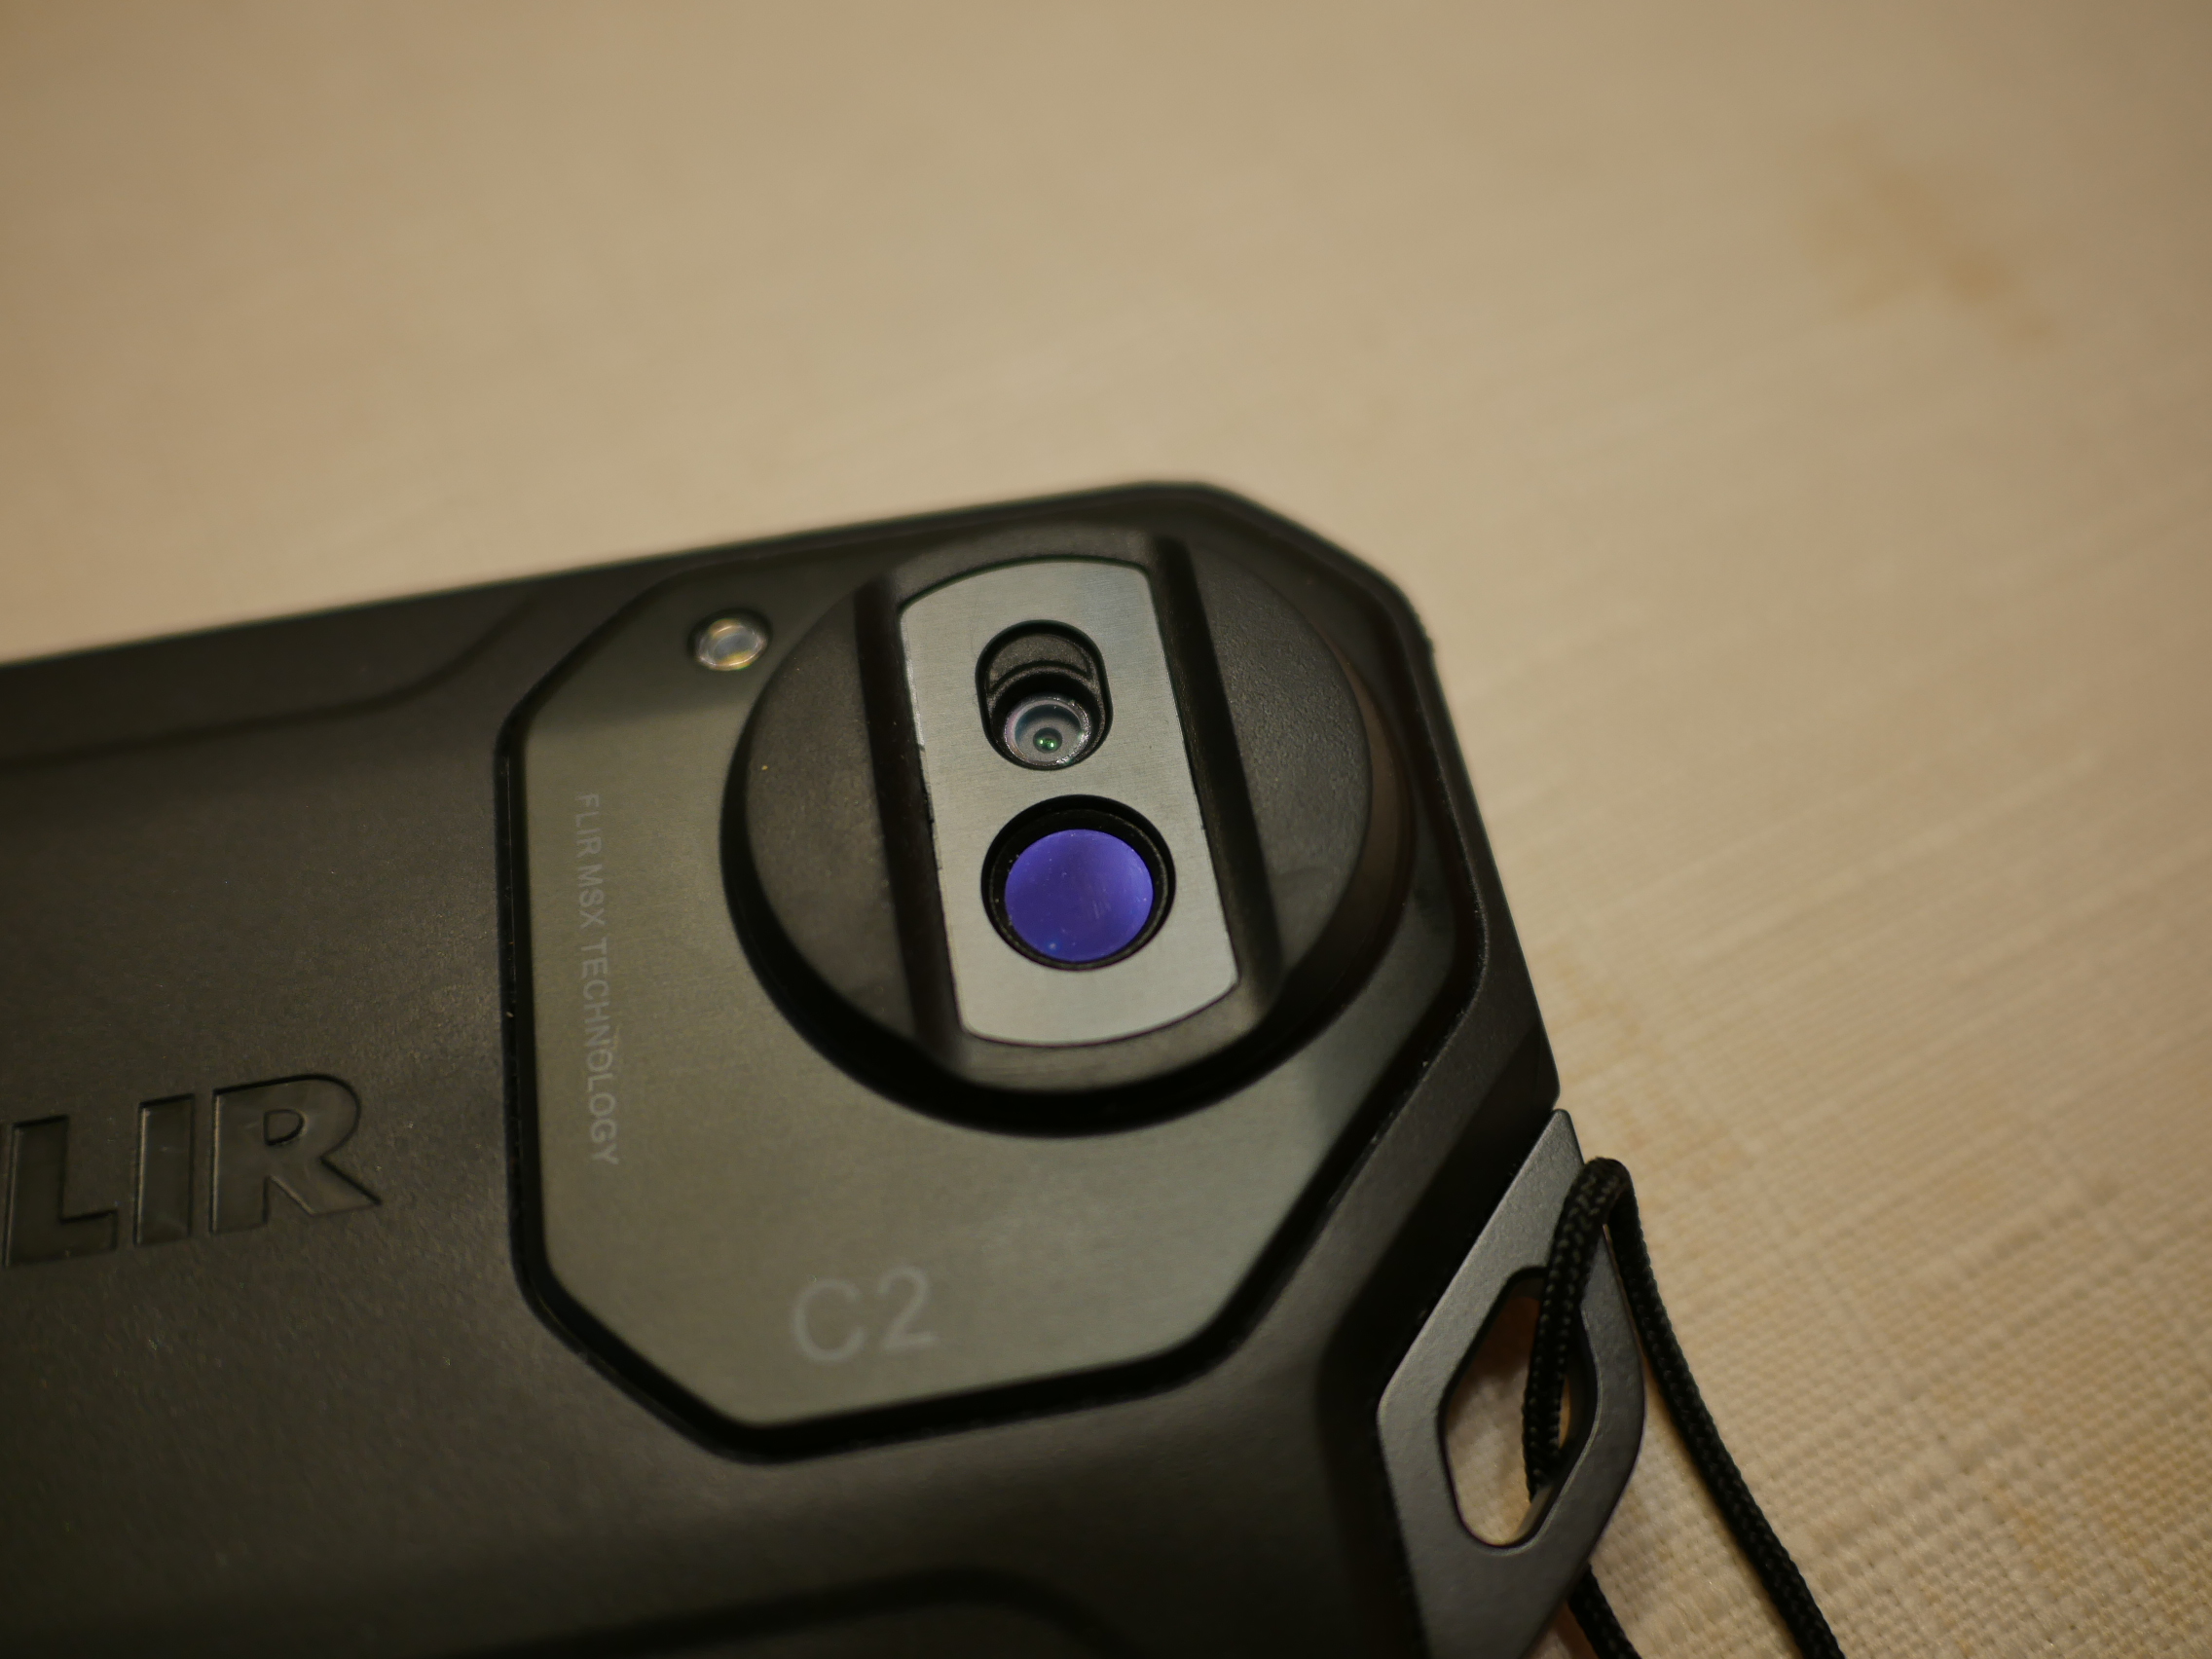
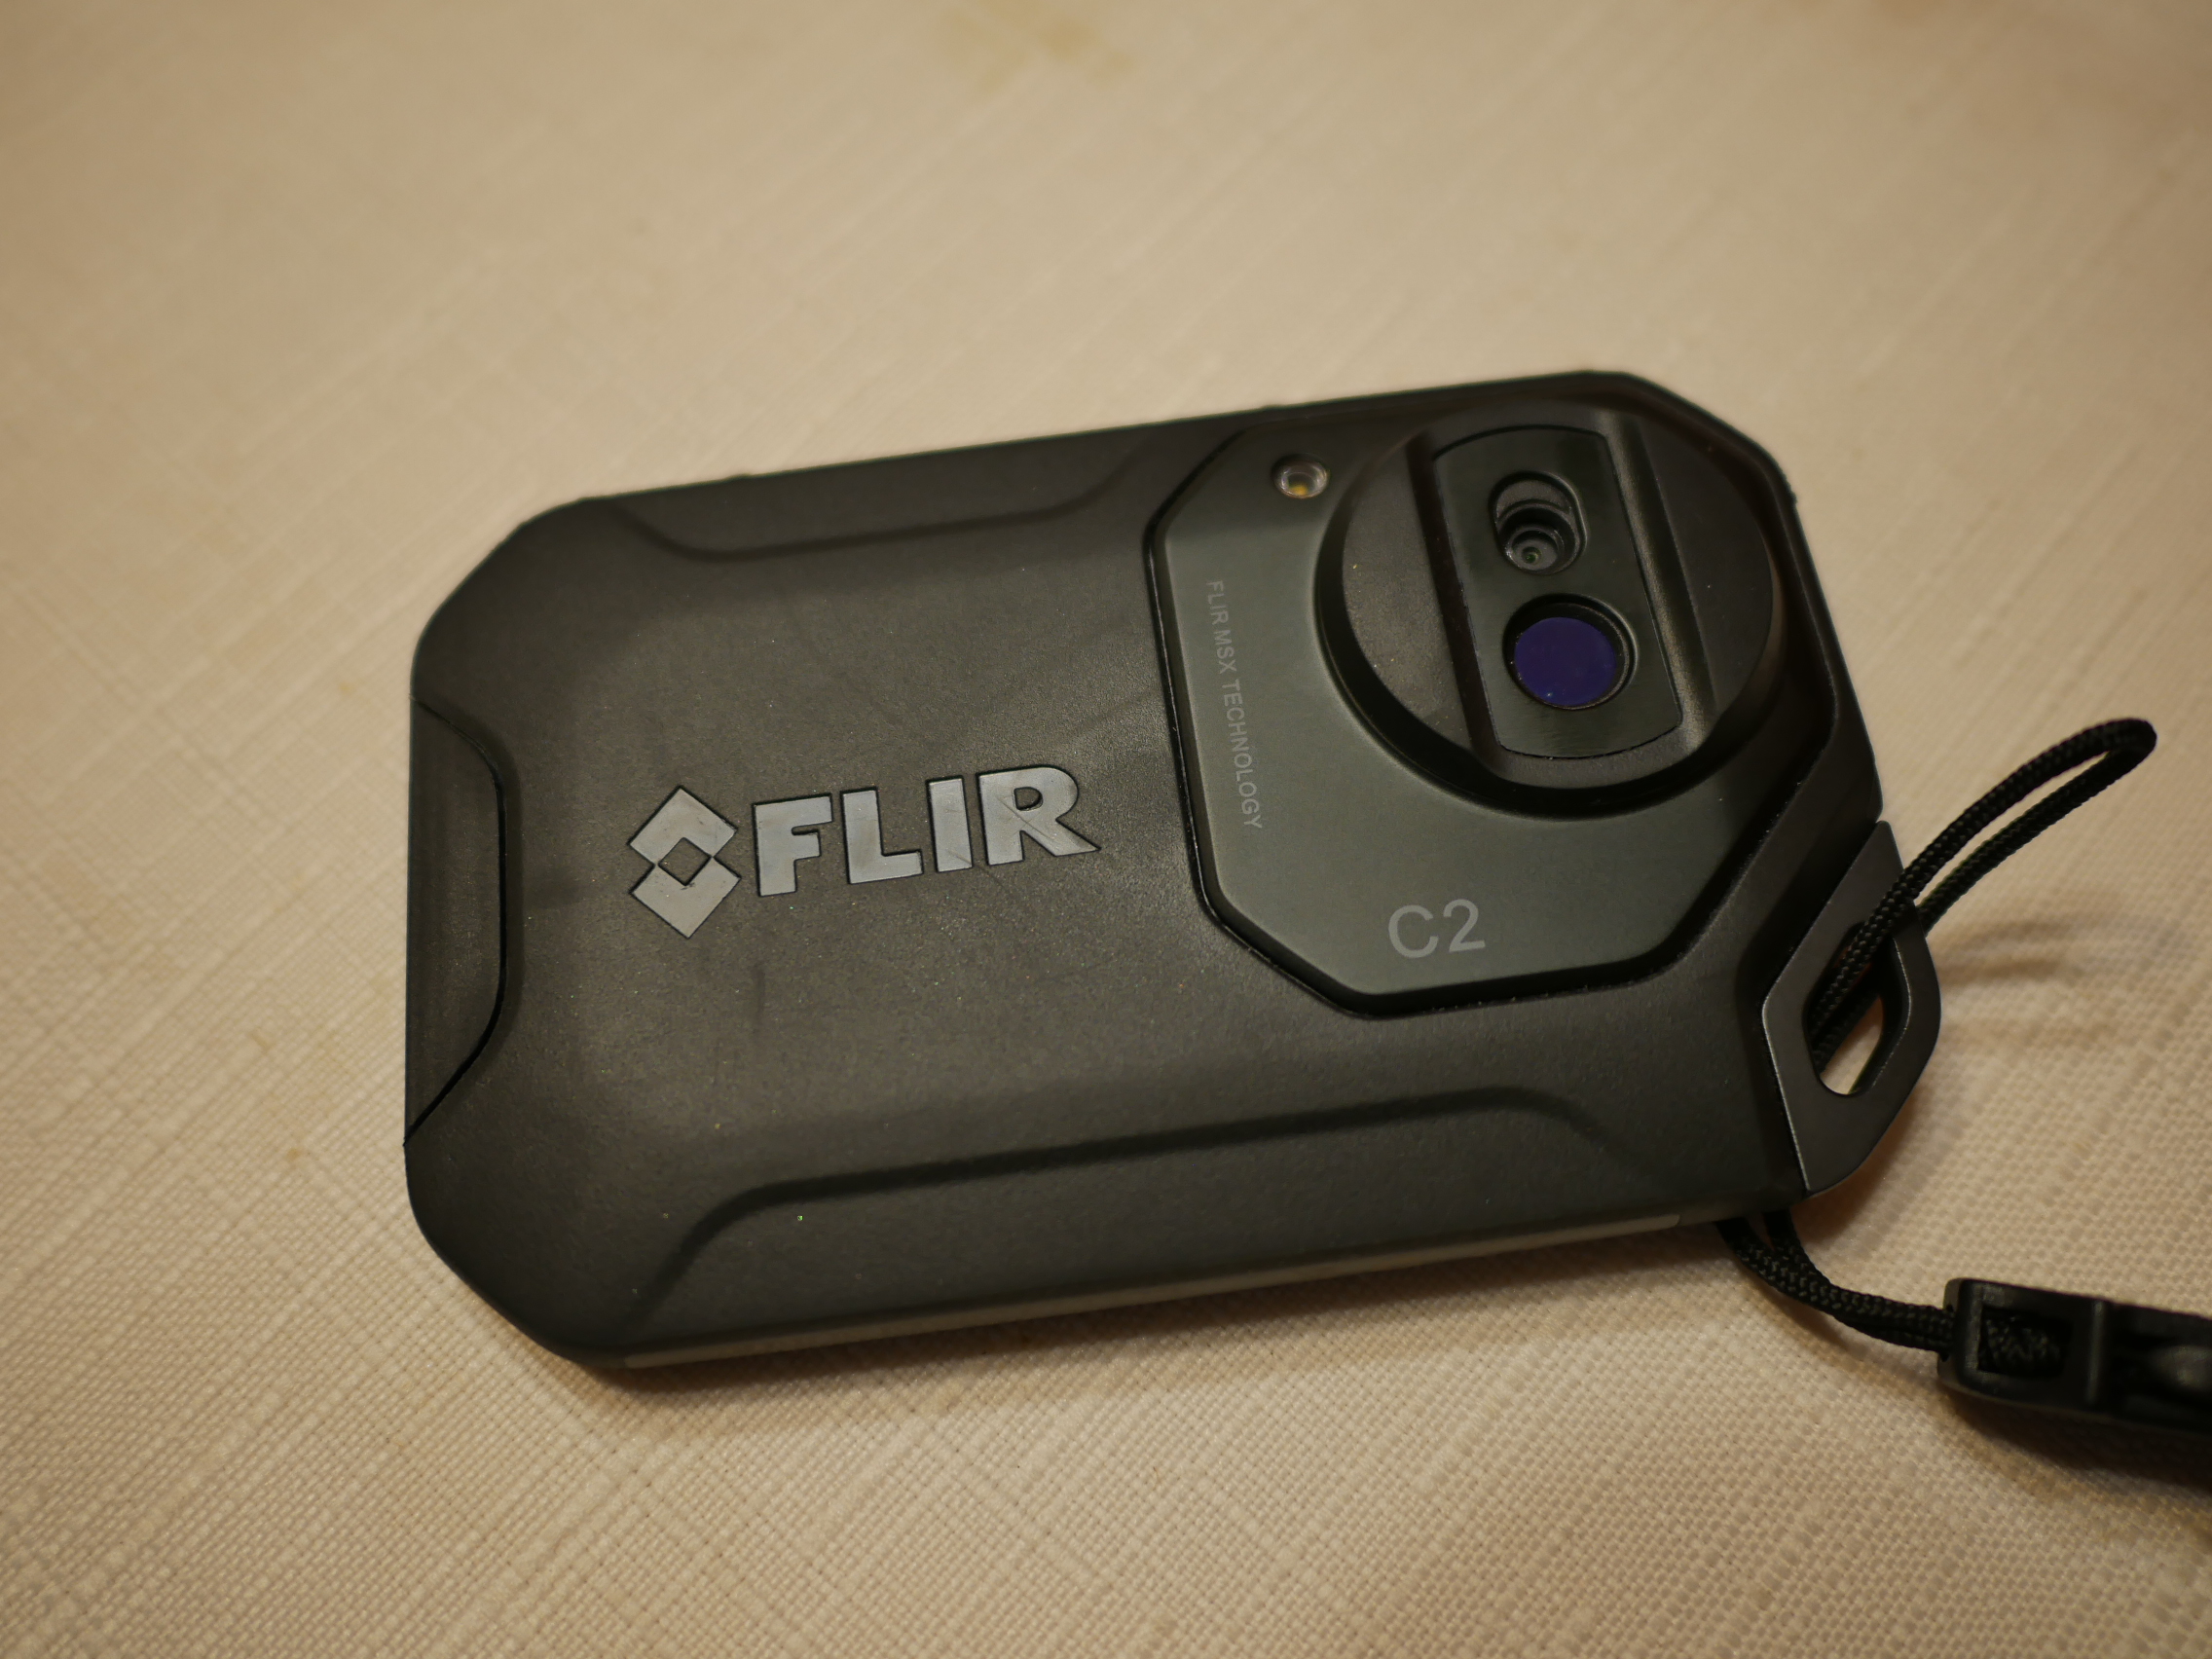
 The thermal imager Flir sent me was their C2 model. What’s neat about this model is that it represent’s todays modern times where people are constantly on the go and carry their mobile device (smartphone) with them everywhere. This device emulates the look and function of a modern smartphone with the wide yet slim candybar form factor making this thermal imager extremely portable. It’s about the size of a smartphone with a protective case installed and can easily slip into your shirt or pant’s pockets making it very pocketable. This is in contrast with conventional thermal imager’s that are much larger and have more of the shape and size of an inspection camera minus the scope and cable. The Flir C2 not only is the same form factor of a smartphone but it also looks like one with a large 3″ touch screen display. It’s on the large end for a thermal imager but rather on the small side compared to today’s massive smartphones with 5″ – 6″ display’s. On the back side of the imager lies the 2 built in sensors and a flash. One sensor reads infrared light while the other sensor is an ordinary camera. The top side of the Flir C2 has the power button and a large wide button used for taking pictures, the right side has a protective flap hiding a USB port for connecting the imager to a PC and to recharge, while the left side has a lanyard loop. The majority of the unit is covered in protective soft rubber to protect from dings, bumps, and drops. Flir went a step ahead of you and incorporated a built in case for your device so you wouldn’t have to go out and buy one separately.
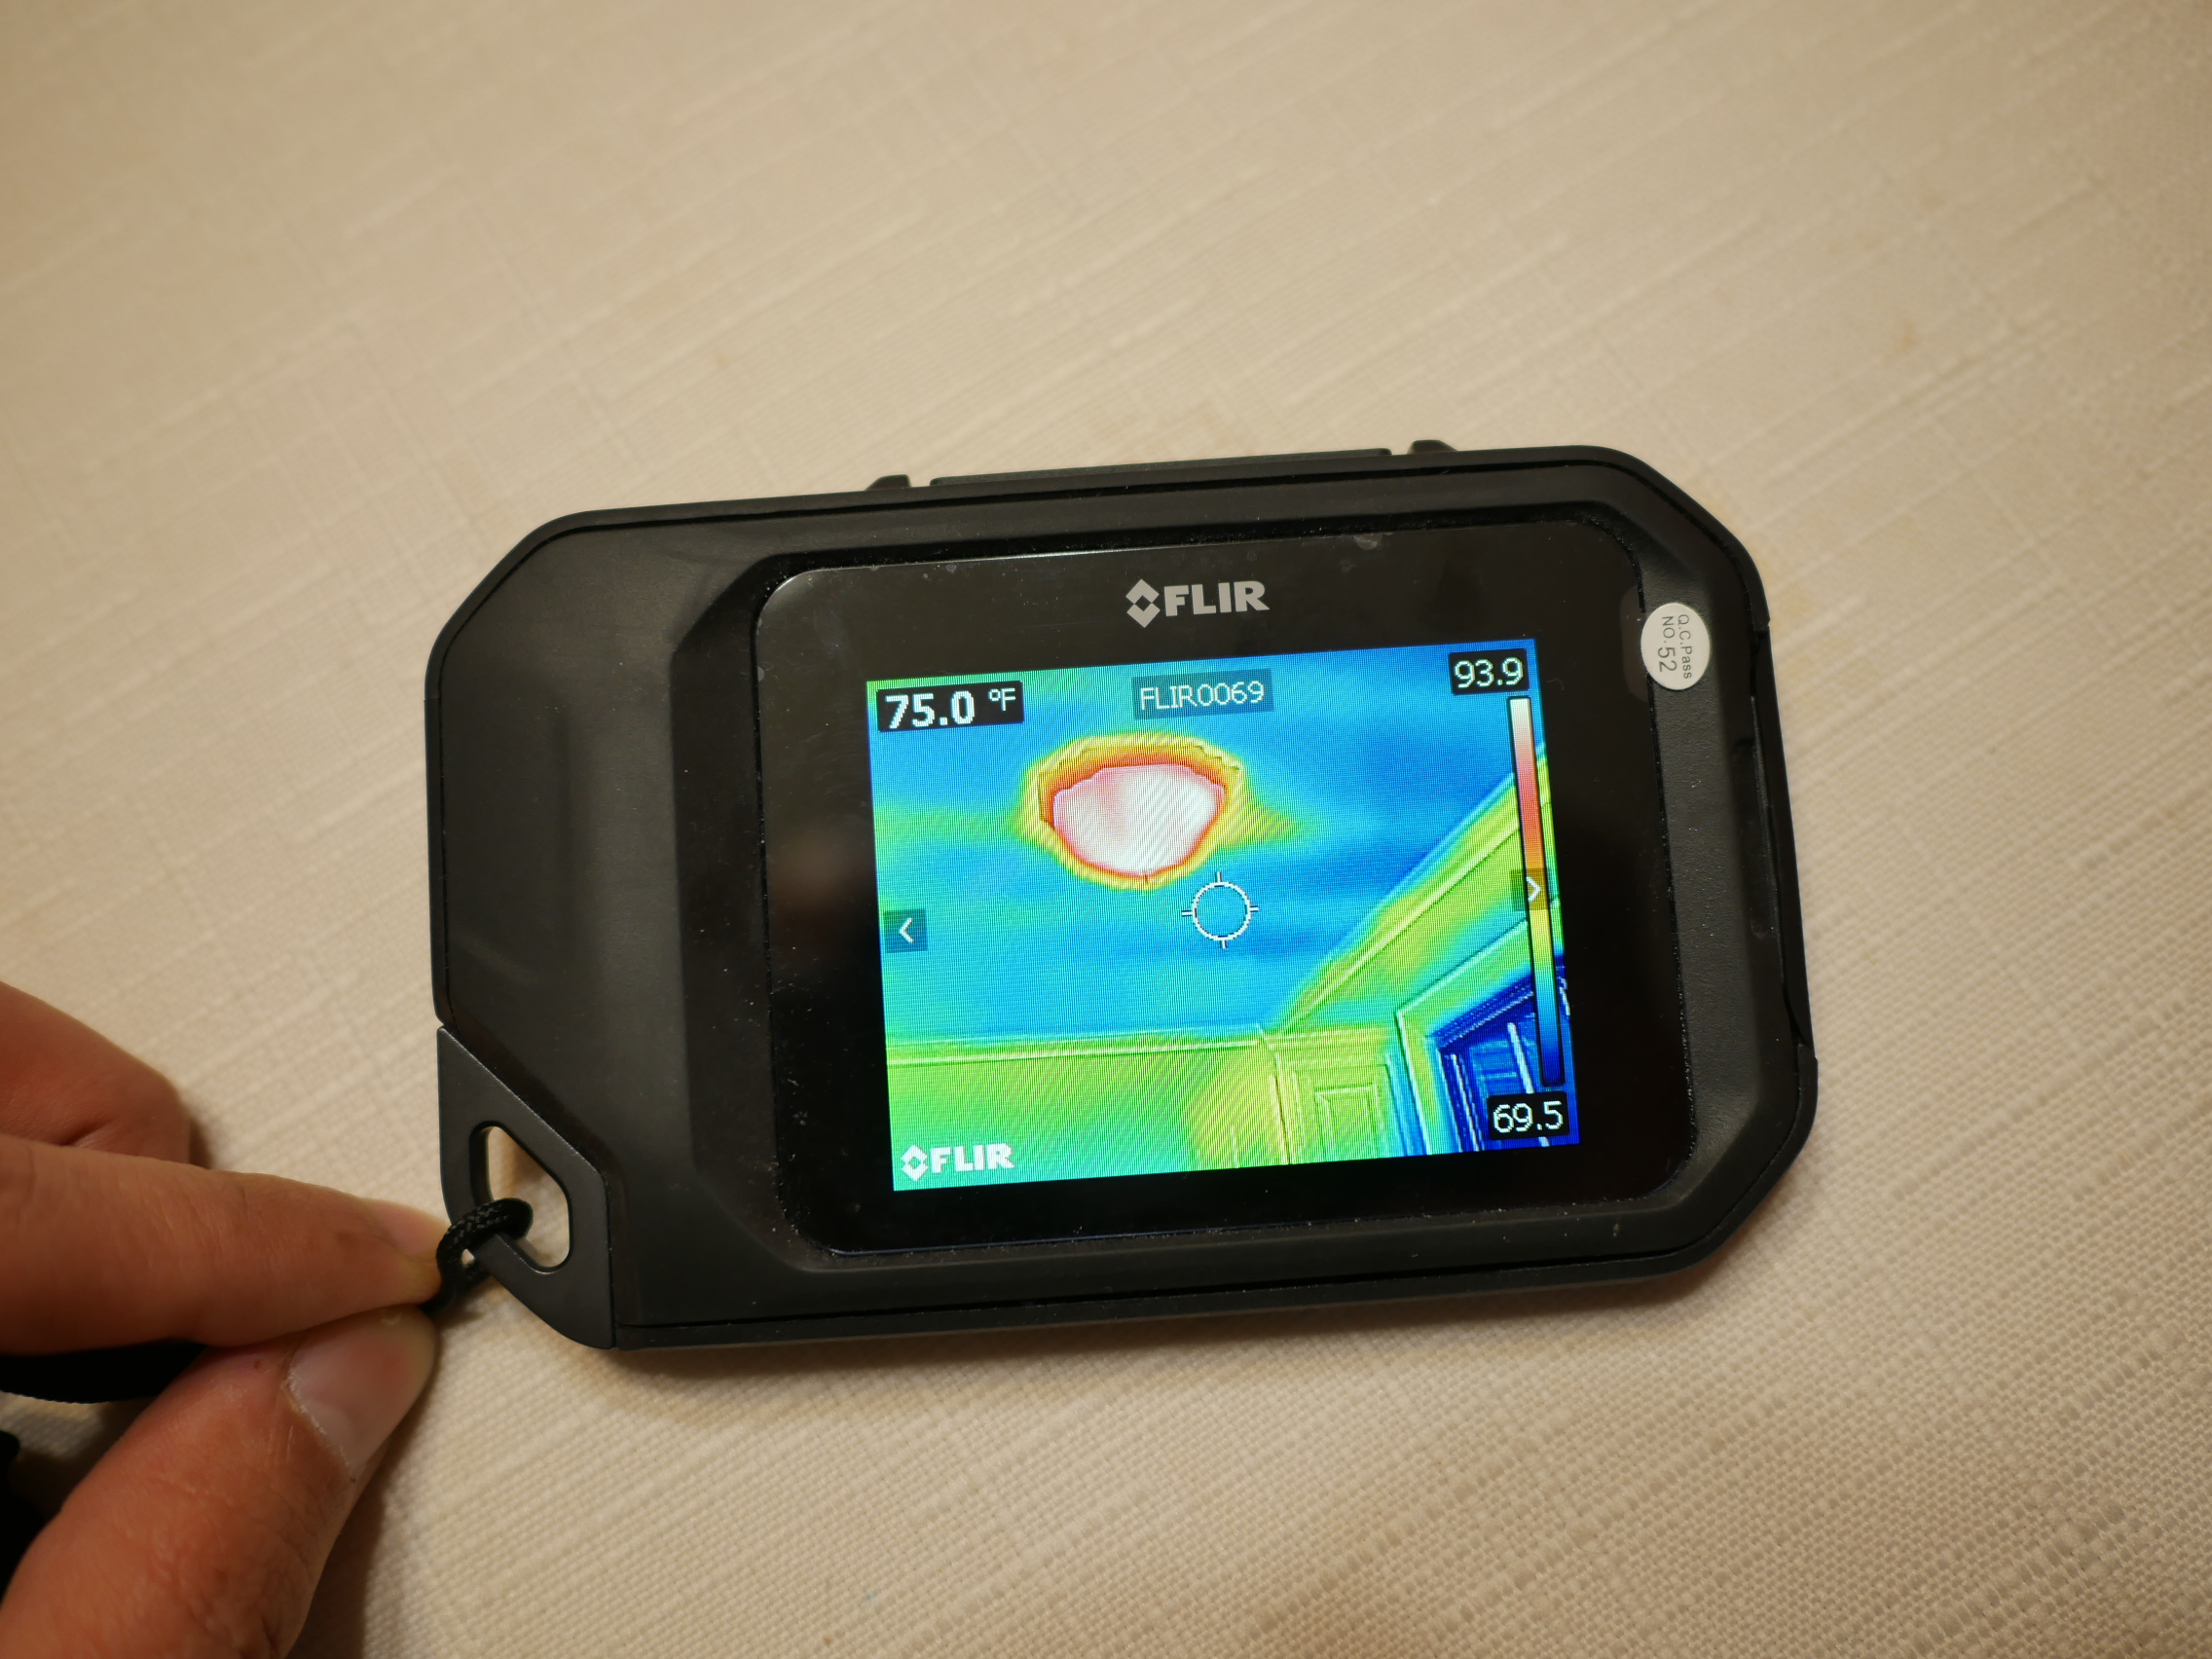
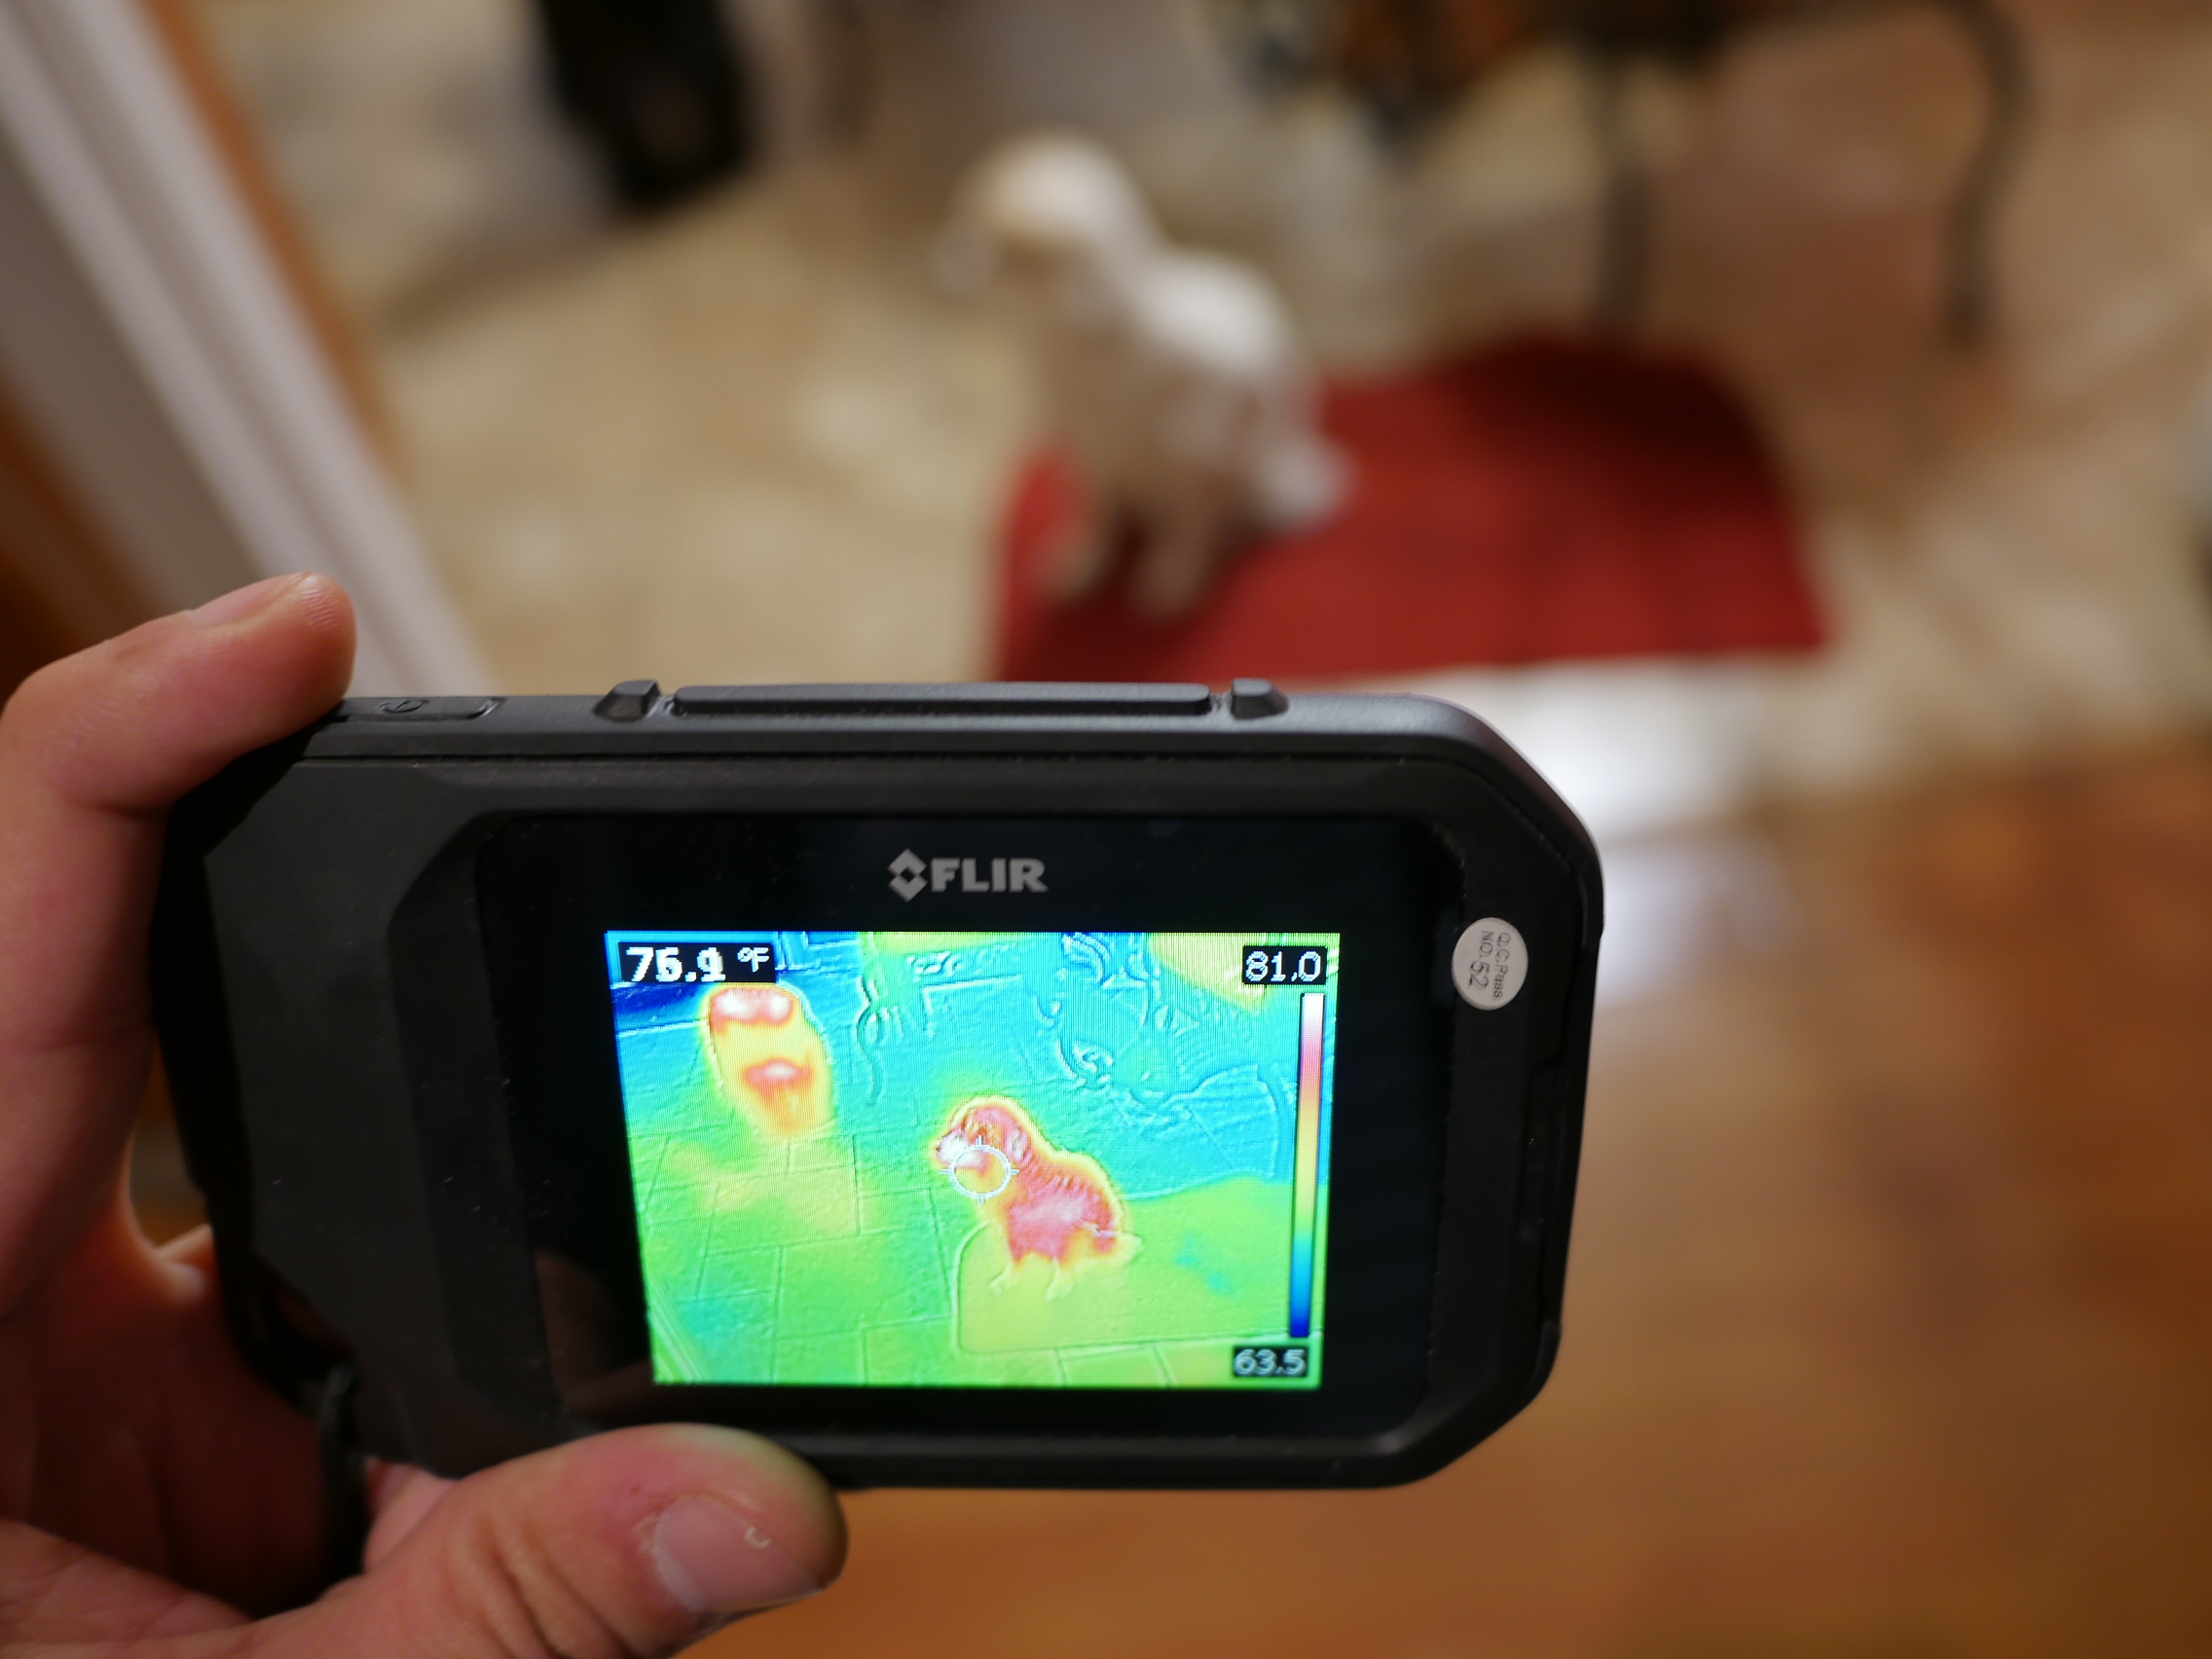
Using the Flir C2 is very similar to using a smartphone, you tap the power button, wait a few seconds for it to turn on (about 30-40 seconds upon initial startup and about 11 seconds startup time after that). After it has turned on, the screen displays what the cameras are viewing in live time. What’s neat about this thermal imager is that it uses both sensors at the same time and overlaps the infrared heat image on top of the regular camera image. Flir calls these MSX images and whats neat about overlaying the infrared image over the camera image is that it adds a level of detail not achieved by the infrared sensor alone. Images from the infrared sensor alone offer enough detail to give you an idea of what you’re looking at, but that’s just it, they only give you an idea of what you’re looking at. By overlaying this image over the camera image, you have a better picture of what you are looking at.
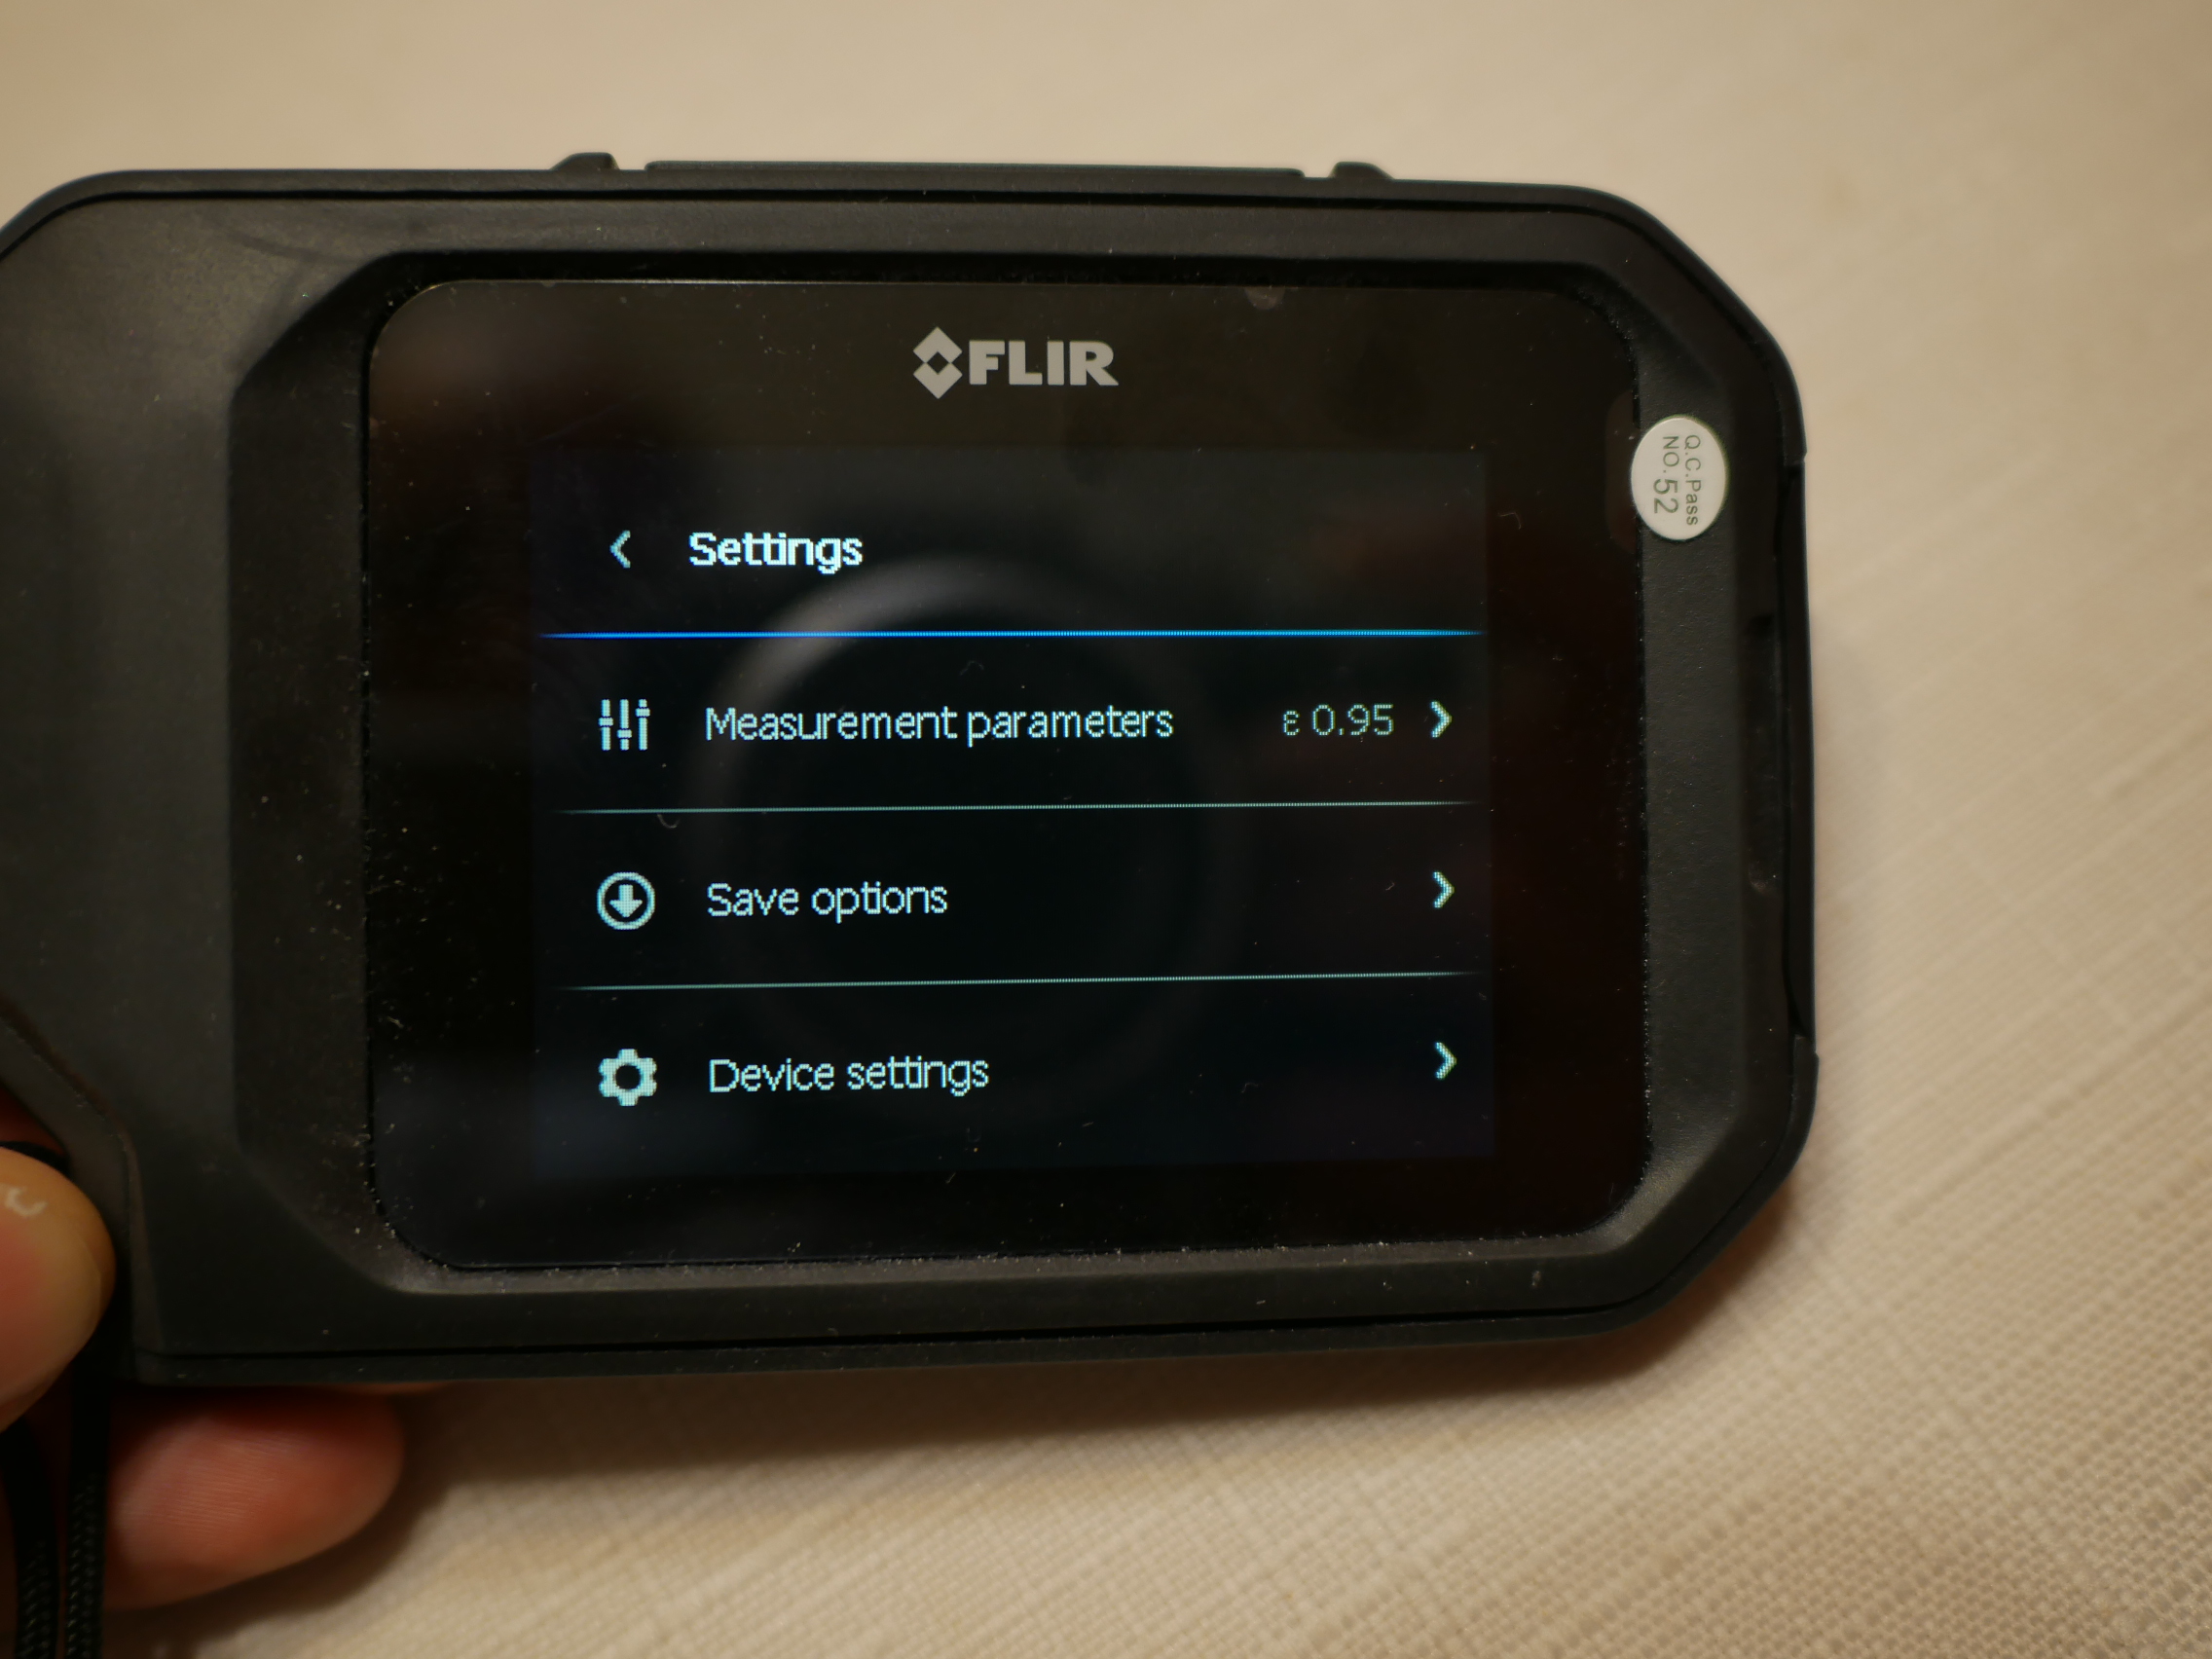
 Snapping pictures with the C2 is as easy as pressing the large wide button at the top and that’s it! The picture files get saved as 2 separate images. The combined MSX image, and a standalone image only from the regular camera. The pictures get stored inside the unit into the built in memory and you can view them later using the touchscreen to swipe through the pictures. A simple tap on the screen makes the menu pop up and all of the C2 menu settings are controlled via touchscreen. Out of the box the thermal imager is set to MSX mode where it overlaps both sensors to form one united picture and you can also go through the menu settings to use only one sensor, whether it be the thermal image sensor only, or the camera sensor only. This is particularly useful if you want to take normal pictures of things, although this would be only useful for taking pictures for documentation purposes since the cameras sensor is very low resolution. In other words, it will not replace your smartphone’s camera if you need to take pictures of your family while on vacation. I did find out that out of the box the Flir C2 doesn’t save jpeg files of the MSX image and a separate picture file for the camera only picture. If you want it to save both pictures separately into the device, you have to go to the settings so that the normal picture files also get saved along with the MSX picture file.
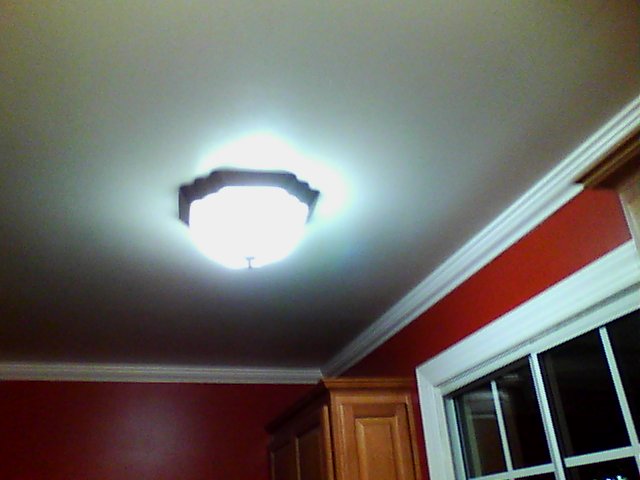
 The picture quality of the thermal images are what I would say “good enough” for documentation purposes. The picture files from the regular camera are pretty small at 640×480 pixels which translates to 0.3 megapixels and the picture file from the thermal imaging sensor are even smaller at 80×60 pixels or 0.0048 megapixels. The thermal images are very basic in terms of detail resolution and while this may sound like a huge leap backwards from todays cameras with upwards of 20 megapixel or higher camera sensors, but this is really not bad at all for a thermal imager for it’s price range. You can still get the gist of what you are looking at and if the thermal image doesn’t make sense, you can always compare side by side with the standalone camera picture file. But in most cases the dual picture MSX mode gives you enough detail so you know what you are looking at.
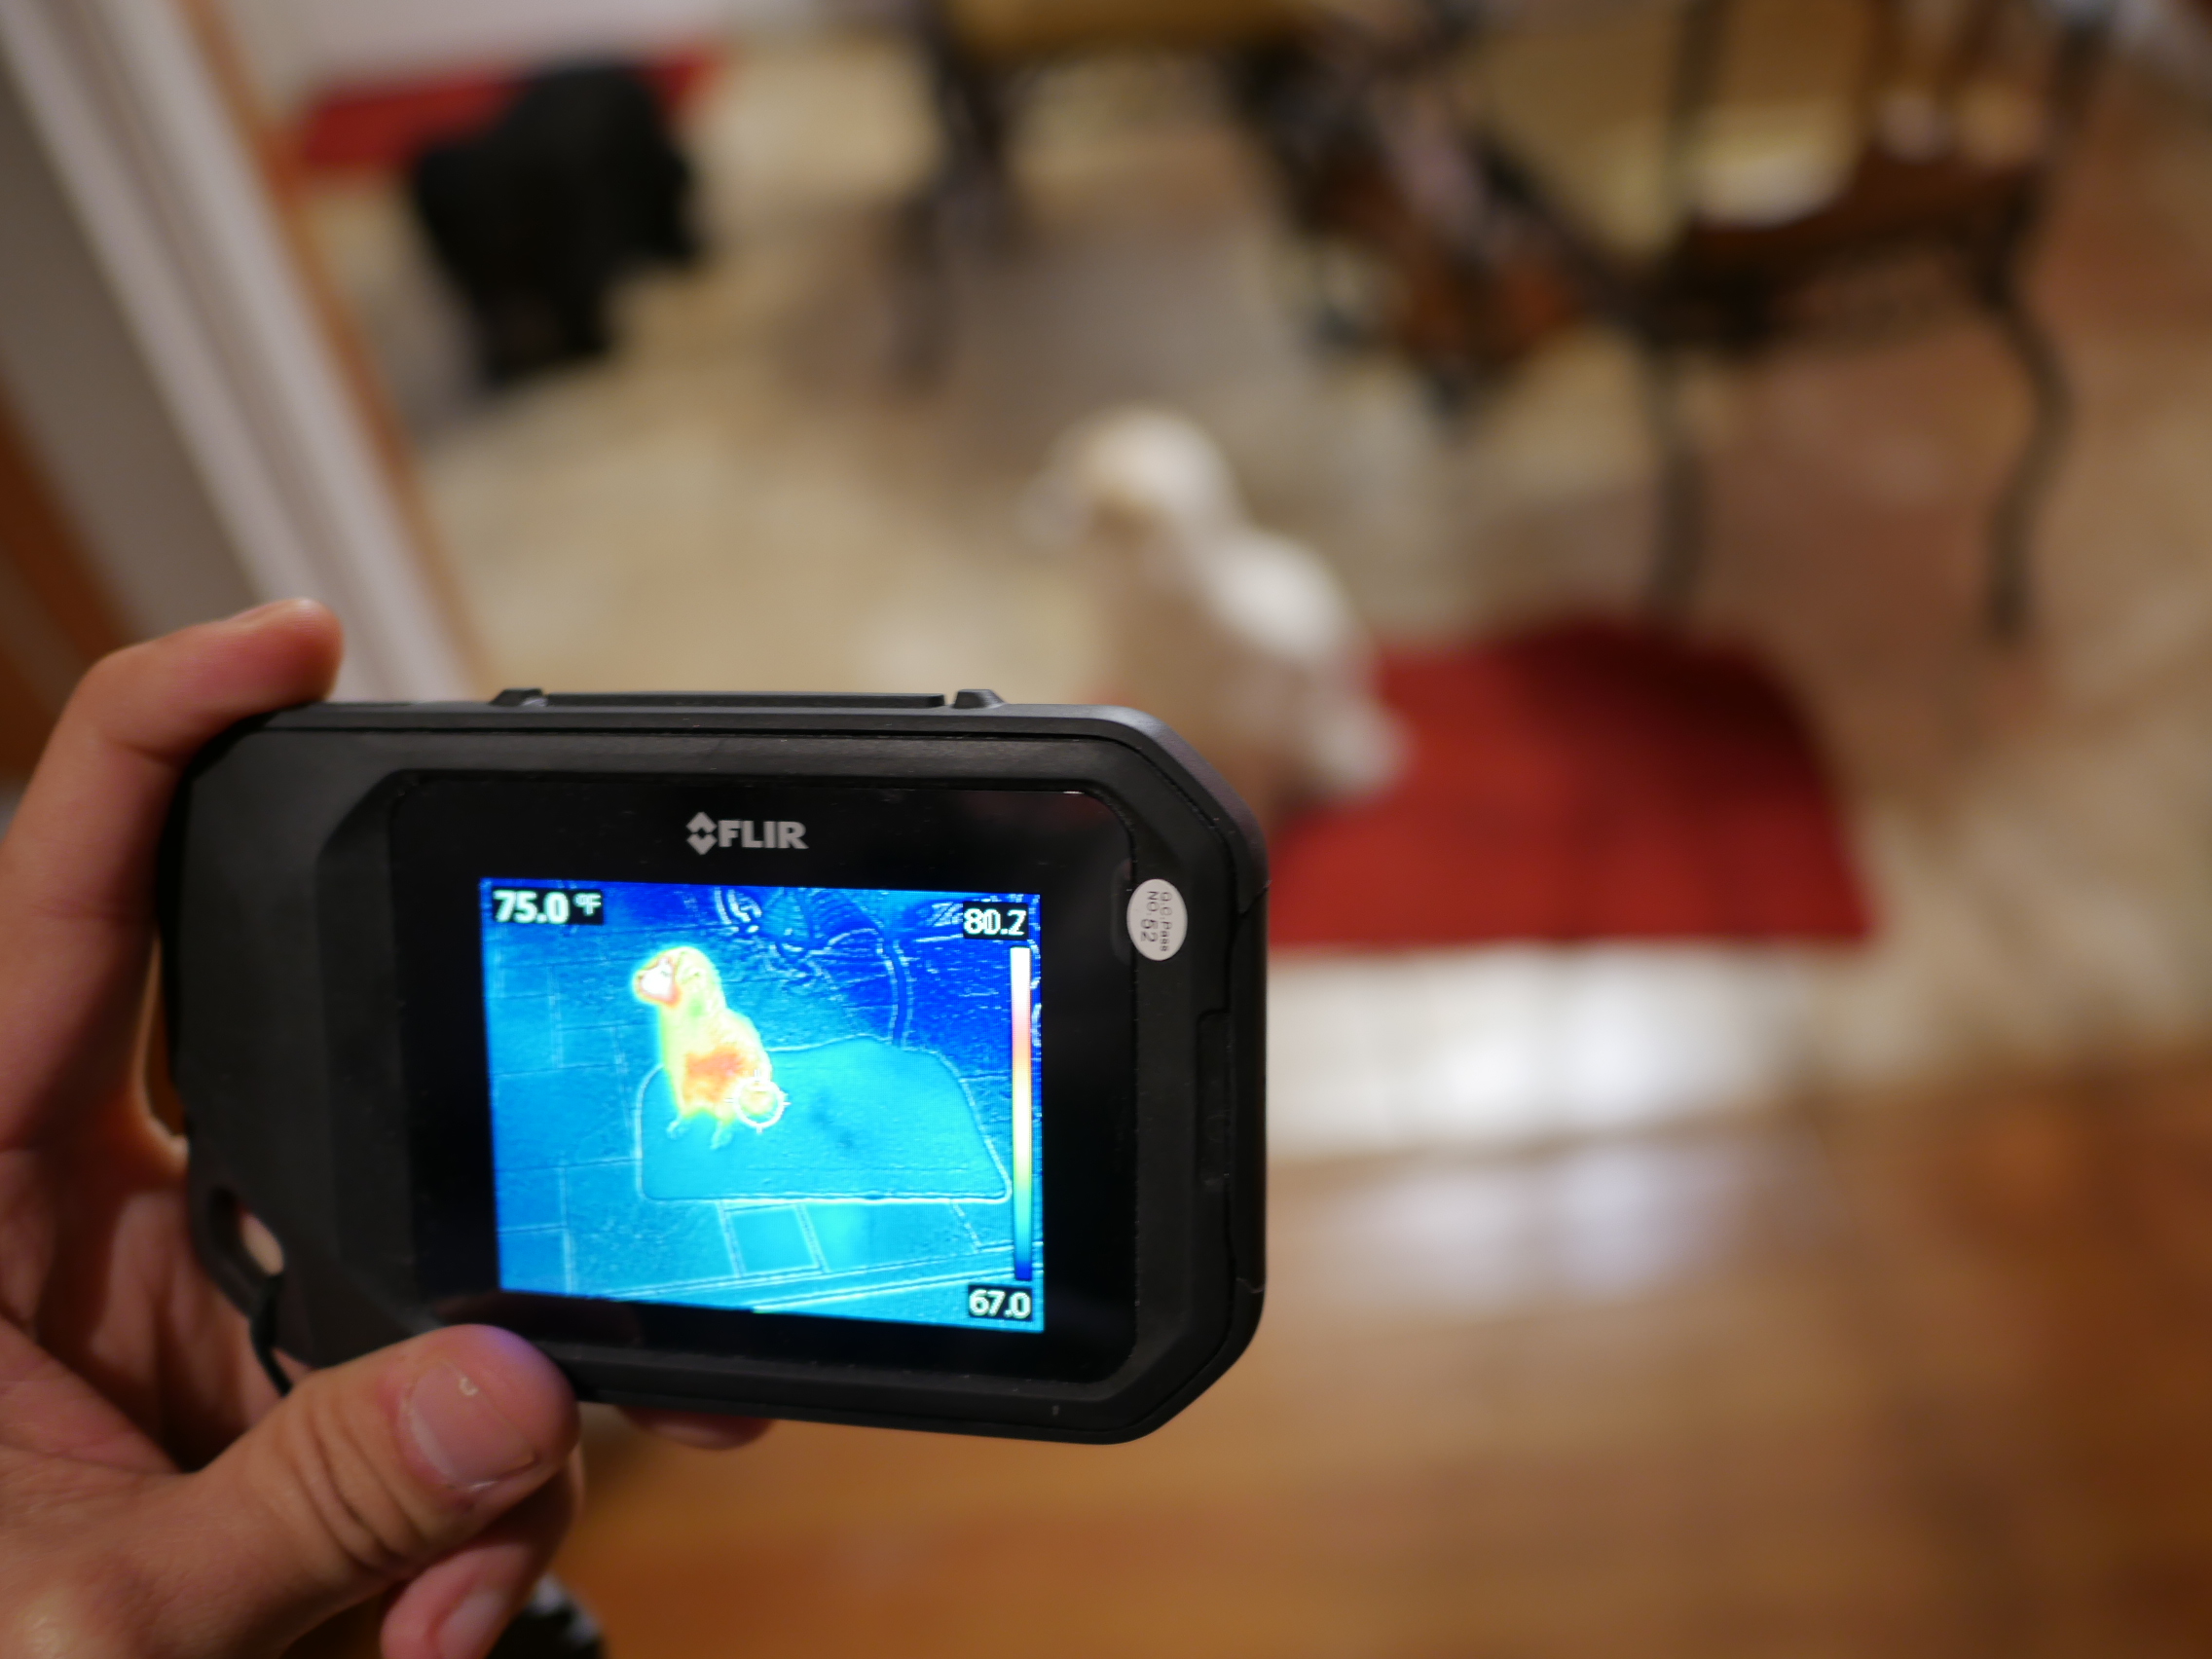
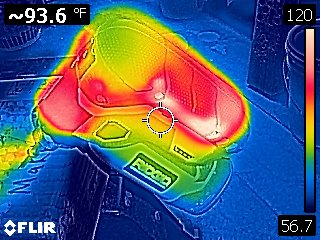
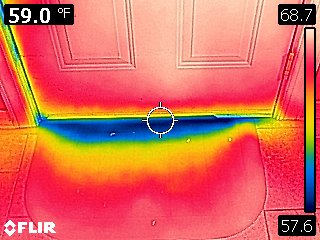
One of the neat things about the thermal imager is that you can change the color scheme of the thermal images. If you don’t like the rainbow colors from the “predator” point of view, you can change it to a different color scheme. You can choose a high contrast rainbow color scheme apart from the regular rainbow color scheme, an “iron” color scheme that shows temp variations with blacks, purples, yellows, and orange, or you can choose a gray color scheme.
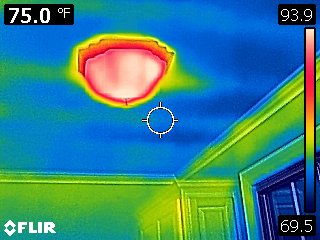
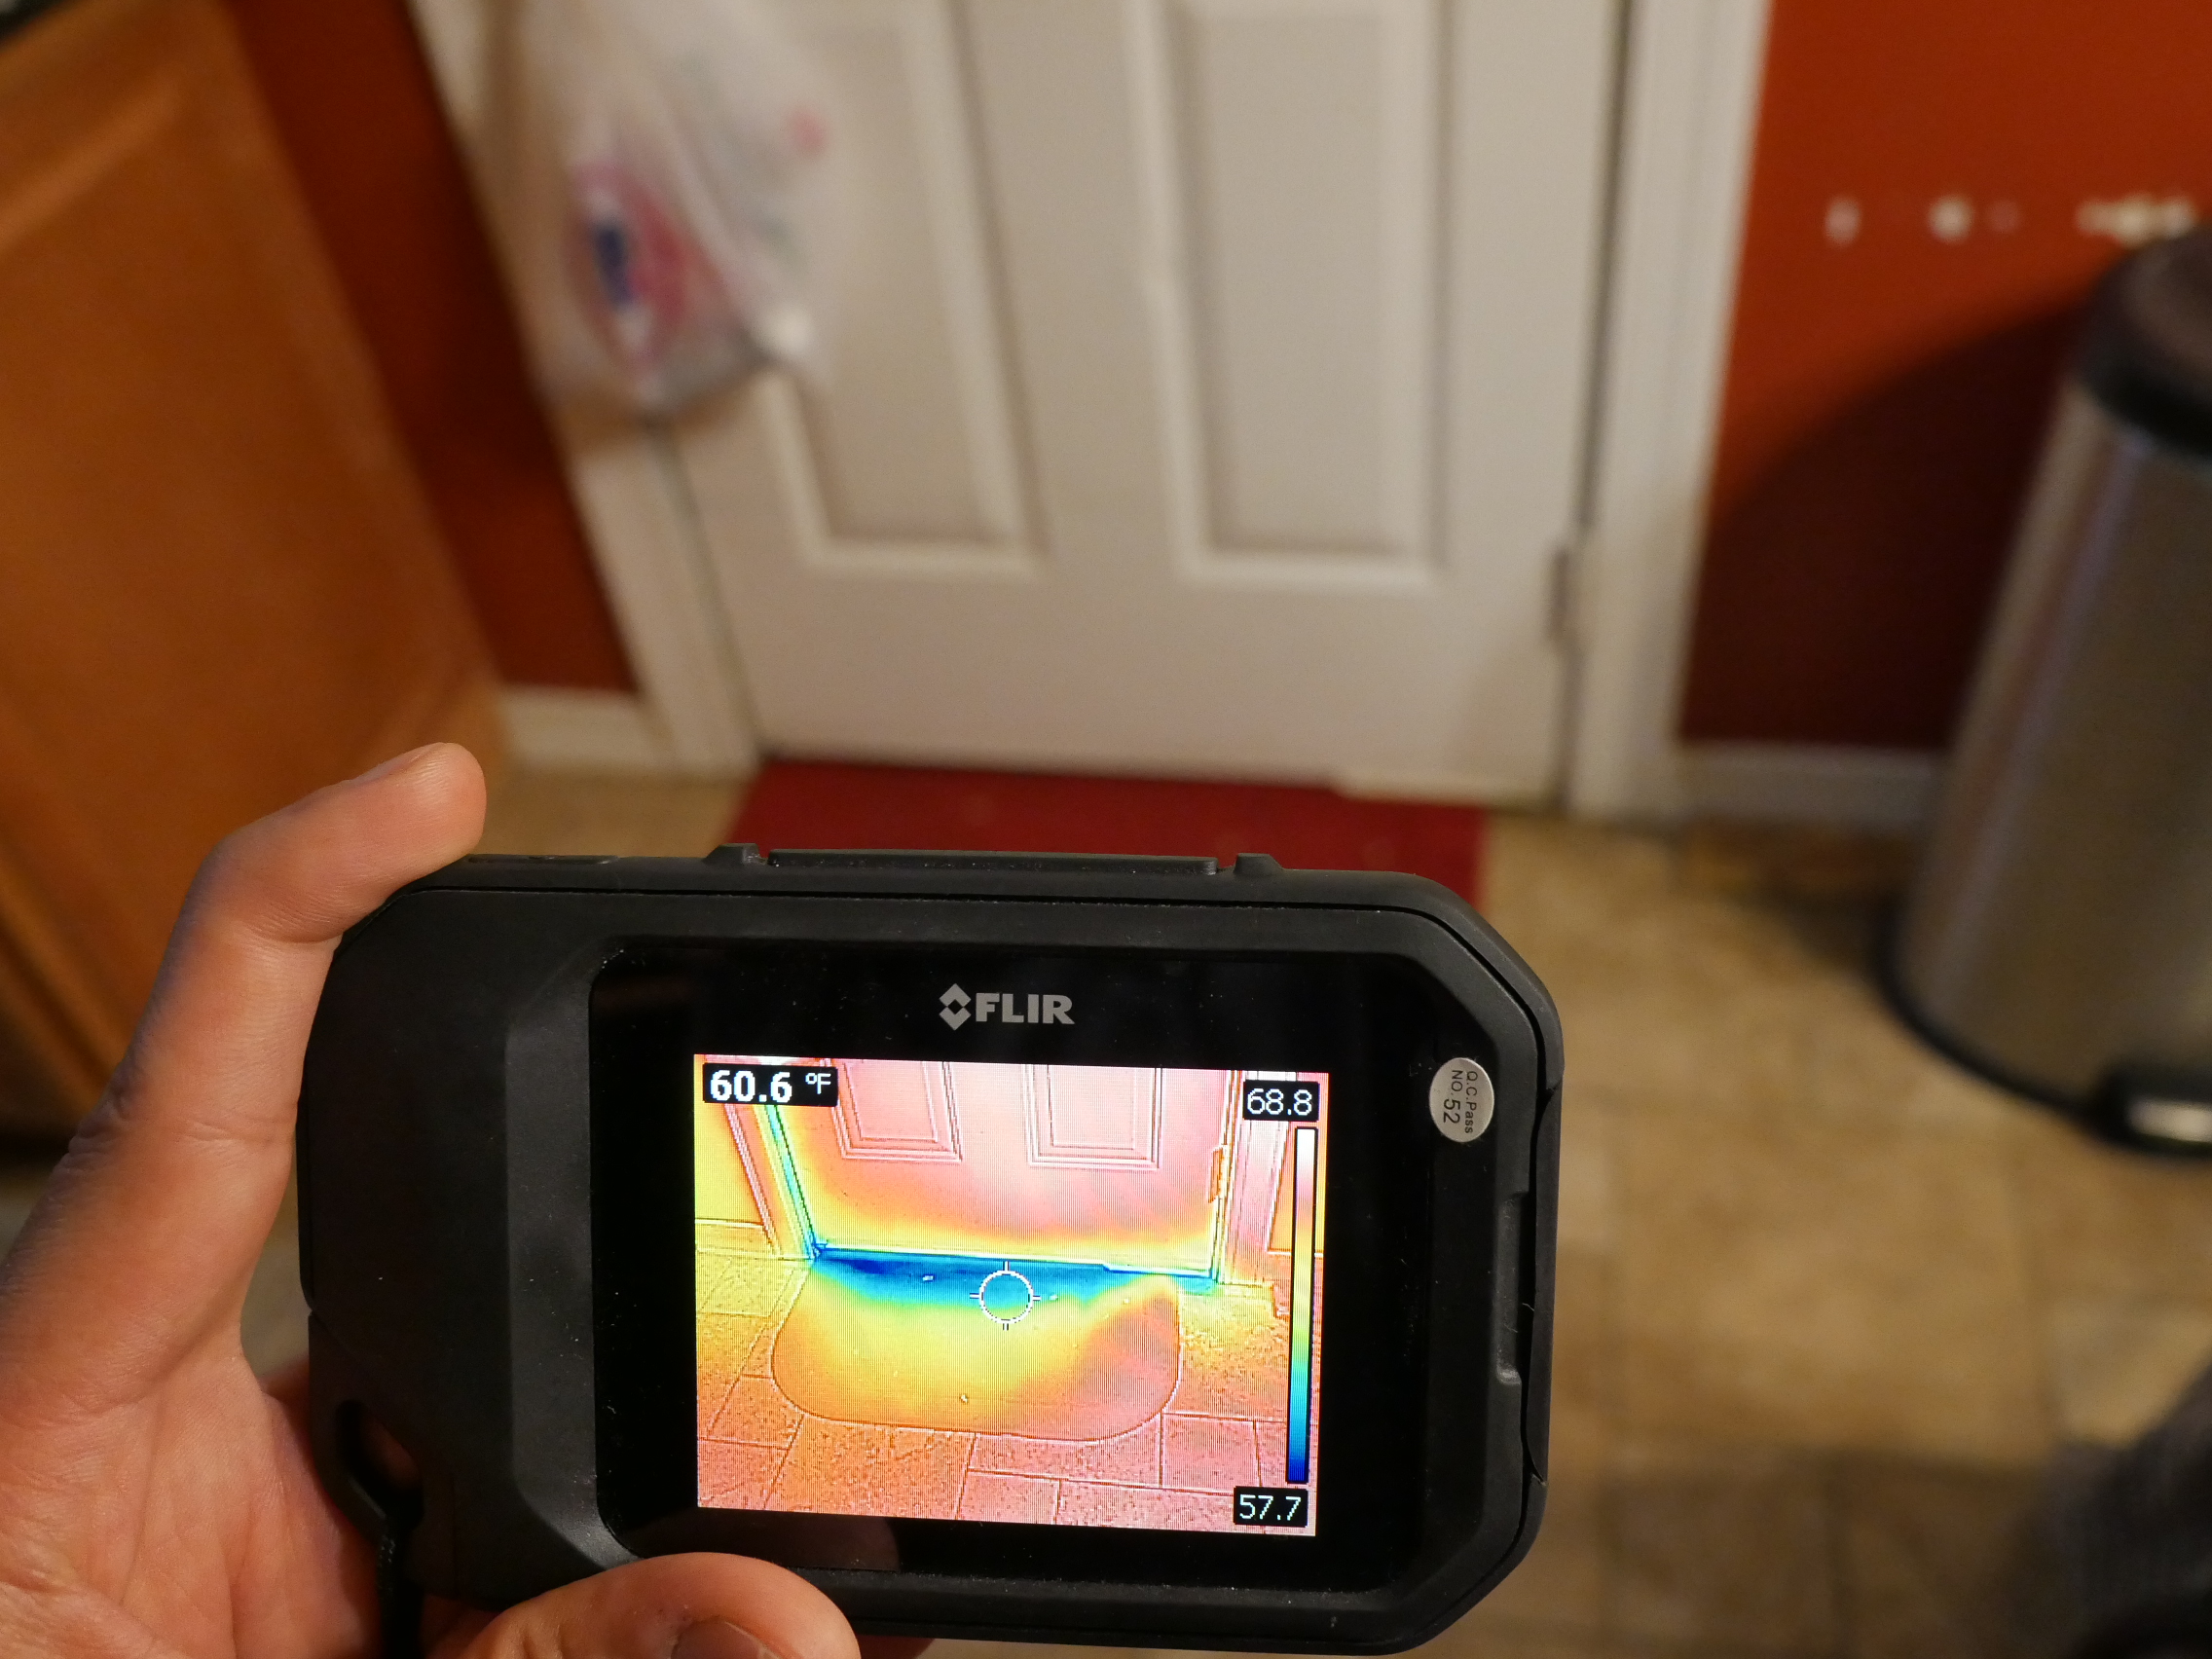
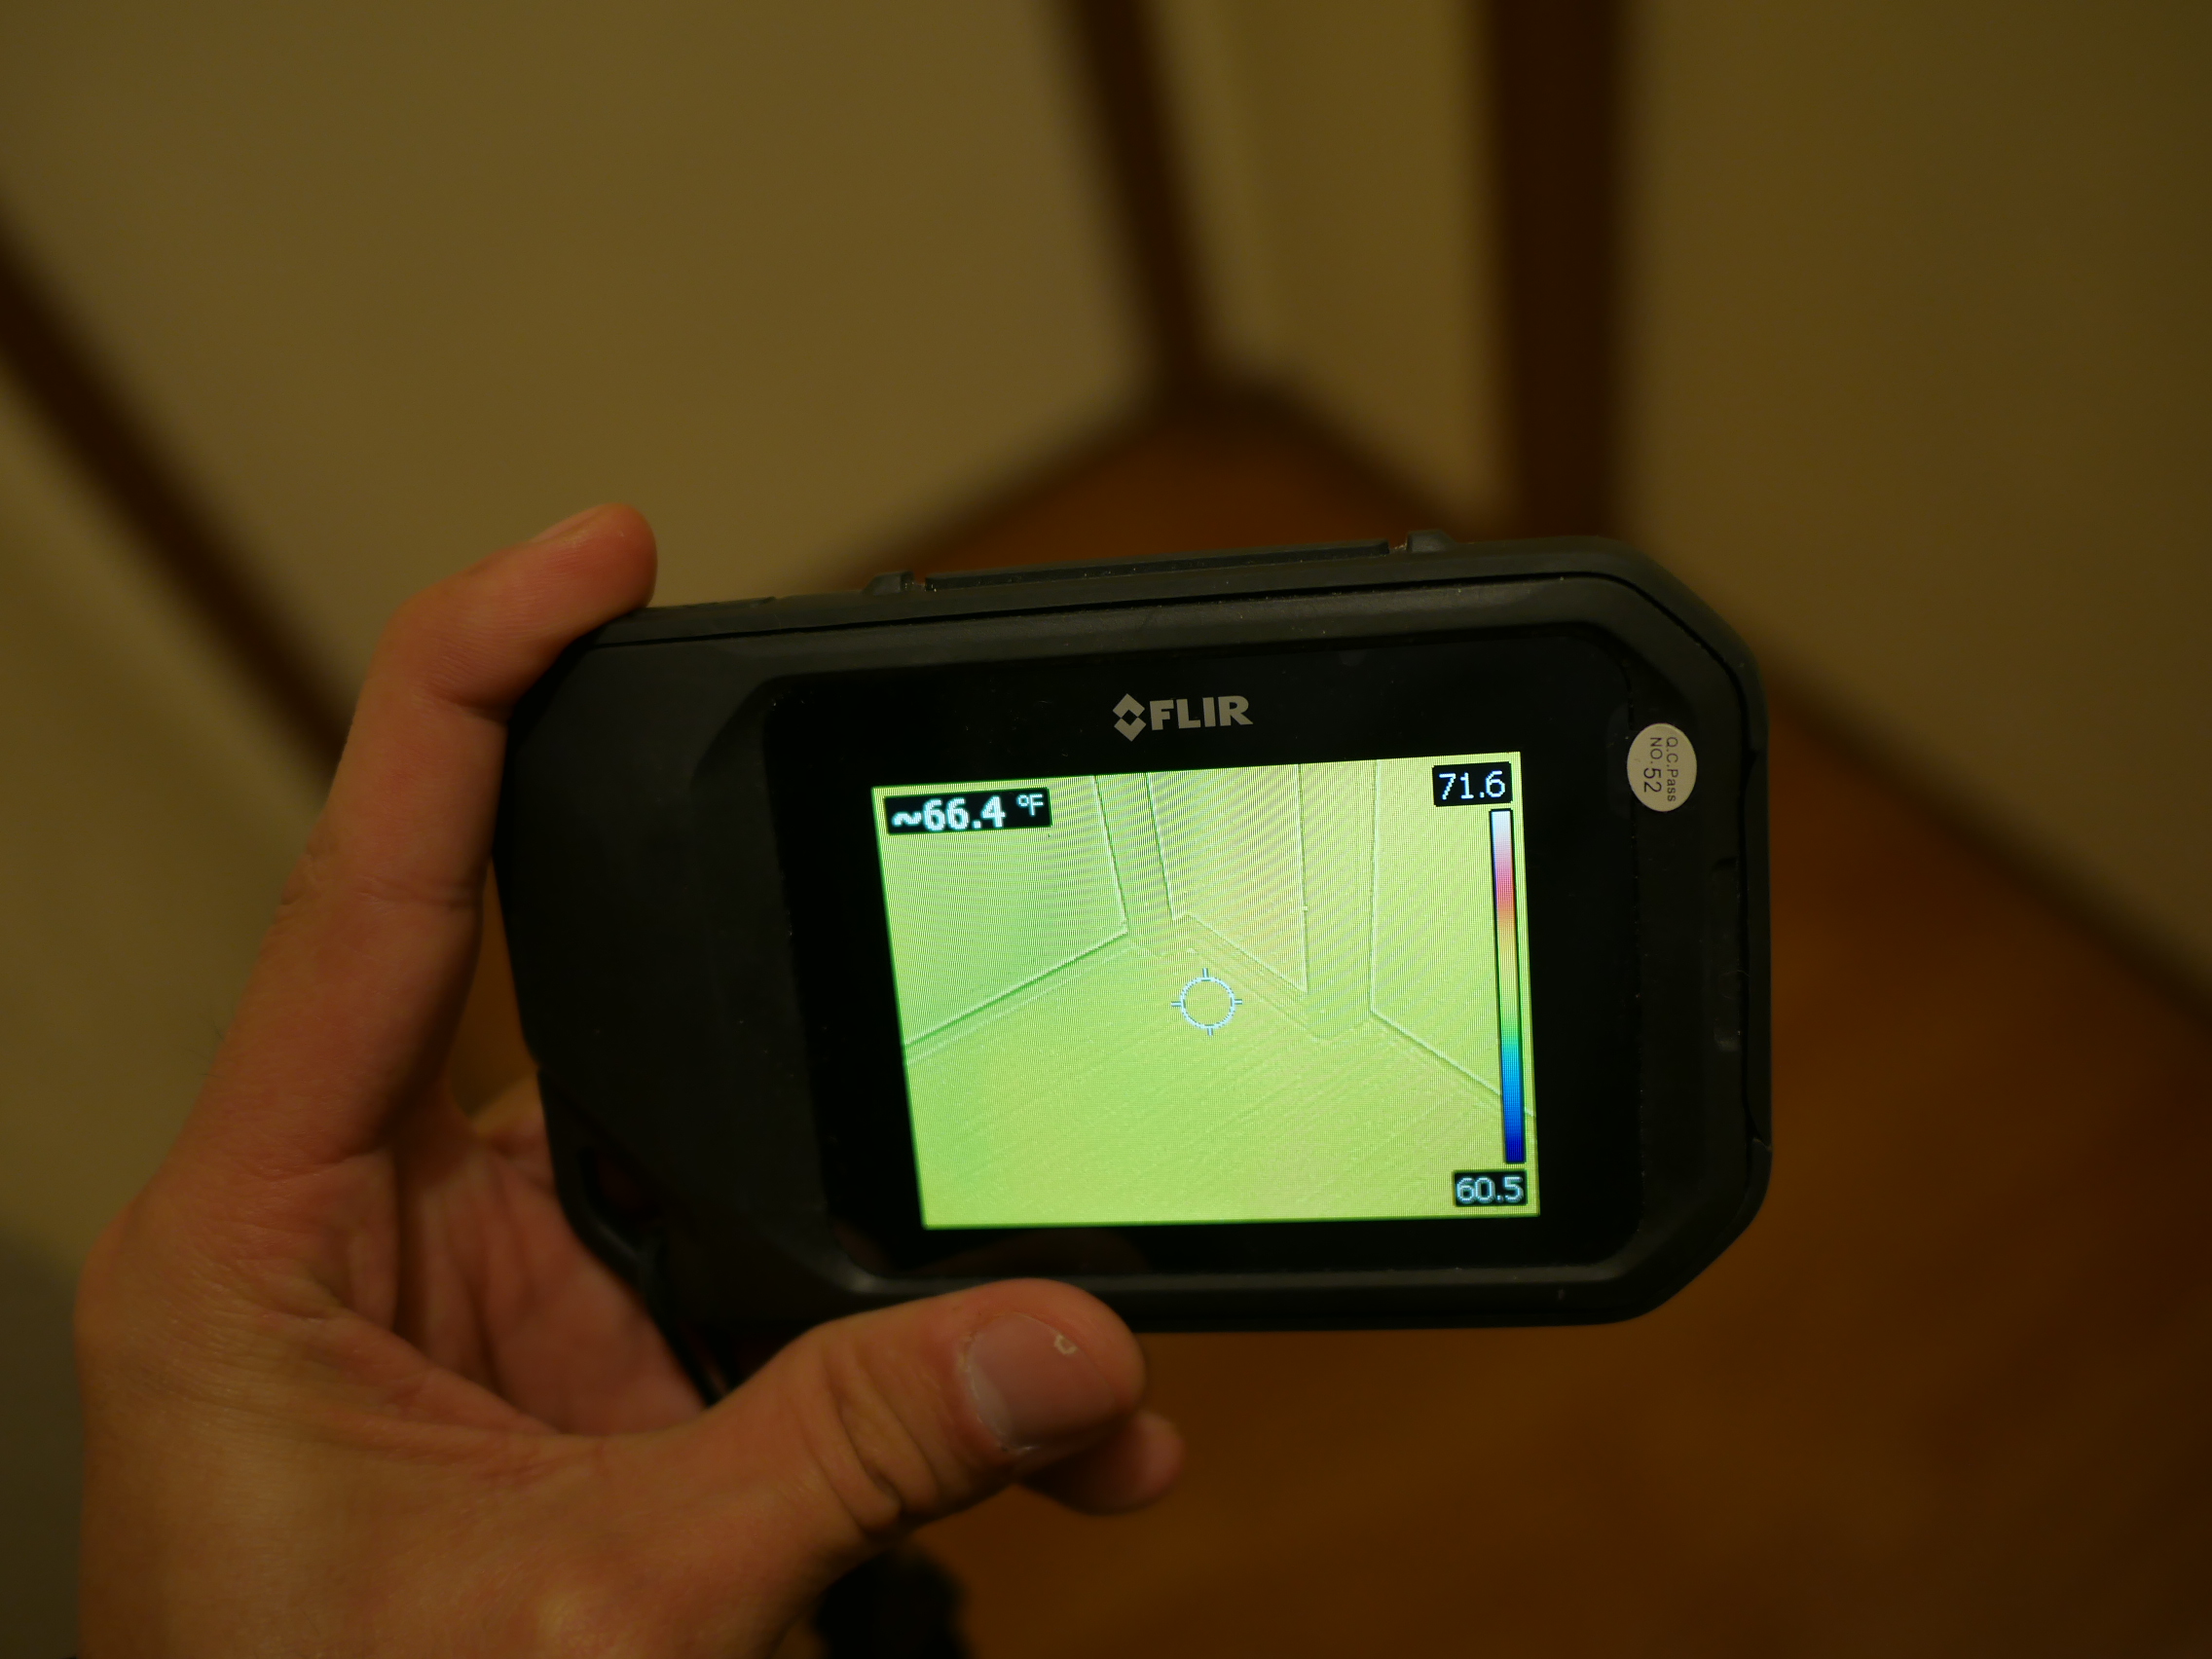
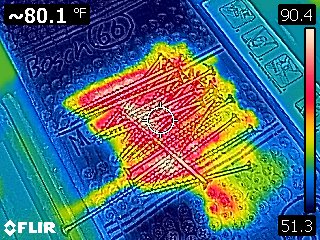
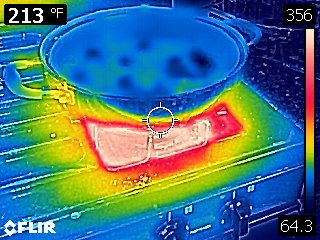
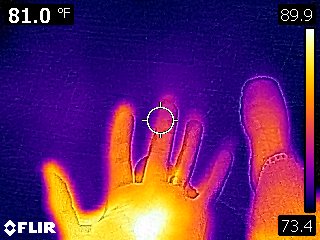 Obviously, the variations of color shown by the color schemes wouldn’t be of much use alone and Flir included an on screen bar on the right of the screen showing you the highest and lowest temperature readings of the entire image while the bar shows gives you an idea of what temperature the colors mean. They also include a on screen circle marker in the center which you can use to to pinpoint temperature measurements with the actual marker measurement shown on the top left. In other words, just aim the marker over something and it tells you the temperature with pinpoint accuracy. You can also set the C2 device to give you temperature readings in fahrenheit or in celcius.
I also noticed something very smartphone like while holding the Flir C2 and this is that the screen self orients itself just like a smartphone when you tilt it to the side. So it will always orient the screen correctly whether you are in the portrait or landscape position.
When pictures are taken in MSX or thermal only mode, they save all onscreen info including the center marker, center marker temperature, temperature range and color scheme bar, and the Flir logo. All of this helps in documenting temperature readings when taking photos so you don’t have to jot down separate notes elsewhere.
Overall, I had a great experience with this new little thermal imaging device. My favorite thing about it is that it’s pocketable and works just like a smartphone except without the hassle of apps. It didn’t take much time for me to figure it out and I never felt like I needed to look at the manual as I never did. Although if you aren’t as technically savvy as I am, you can also check out the included memory stick which has all the instructions. I also don’t have to worry about dropping it since it has a built in rubber bumper case for added protection. I like that it has built in memory to store photos (165mb to be exact) and while that may not like much memory, image files are very small, between 70-108 kilobytes but averaging around 85kb per file so you should be able to easily get around 2,000 pictures if my math is correct. The picture quality of the thermal images is good enough to get an idea of what you’re taking a look at. Nothing to brag about but enough detail to get the gist of things and the MSX mode does help out and if that doesn’t do the trick, you can always compare side by side with the regular camera pics. The pictures coming from the regular camera sensor are very very archaic so you won’t be using this for everyday photos as this C2 is a purpose built technical piece of technology for taking visual thermal measurements.
A few things I noticed that weren’t on the Flir C2 that I would expect from a modern device was a micro sd memory card slot and wifi. Without an SD card slot or wifi, I am forced to connect the C2 to a pc using the included micro USB cable for downloading pictures from the device. This means I need to go to my office to upload photos taken on the device or have my laptop with me while I am using the Flir C2. It would be so much easier in practical terms to use a micro sd card so I could just remove the card from the C2 and insert it into a pc or into my mobile device such as a smartphone. Once on a smartphone I would be able to send pictures on the go via email or via text message. Built in wifi would also be useful for transferring picture files wirelessly to a pc or smartphone. Although wifi or a micro sd card slot are not included, the good news is that a USB transfer cable is included and uses the universal micro USB connection so in the case you ever lose the included cable you can easily find replacement cables and can even use the one you use to charge your smartphone. The USB cable also charges the Flir C2 so you can keep it’s battery charged.
One big feature that is missing is the ability to record video on the Flir C2. Although this is the first thermal imager I’ve ever tried and not sure if other thermal imagers have this feature or not, I actually expected the C2 to be able to do so. Since it emulates the look and feel of a smartphone, why not be able to take videos like smartphones as well? After all, some inspection cameras can snap and record picture files as well as record video and this can be a great asset for inspectors. Even without the video function, lack or wifi, and sd card slot, I still had a great experience overall with the Flir C2 product as it works as intended and helps me see the variances in temperatures visually and takes temperature readings with pinpoint accuracy. I also and found it to be very well equipped. Many features like the small smartphone pocketable design with it’s easy to use picture button and touchscreen abilities make me feel well at home with today’s modern family. As a current smartphone user, it was easy for me to pick up, figure out and start using without the need for a manual. And I dare you to try and fit your standard thermal imager in you shirt pocket. It won’t take long to see how useful it’s pocketability comes in handy.
Click here to purchase on Amazon with free shipping
- Imaging and Optical Data IR Sensor: 80 × 60 (4,800 measurement pixels)
- Thermal Sensitivity: ‹ 0.10°C
- Field of View: 41° x 31°
- Object temperature range: -10°C to +150°C (14 to 302°F)
- Accuracy: ±2°C (±3.6°F) or 2%, whichever is greater, at 25°C (77°F) nominal
- Its lightweight and slim profile fits into any work pocket
- Built-in LED spotlight you can use as a flashlight and for photo illumination
- MSX-enhanced thermal images provide stunning detail to help you identify problem areas easier
- FLIR Tools professional reporting software included – the industry standard in thermal image post analysis
- Radiometric image stores 4800 pixels capable of capturing thermal measurements from -10DegreeC to 150DegreeC
Includes
- FLIR C2 Imaging System
- Lanyard
- Power supply/charger with EU, UK, US, CN and Australian plugs
- Printed Getting Started Guide
- USB memory stick with documentation
- USB cable


That’s awesome, I really like that it’s only as big as modern smartphones and can easily be put in a pocket. I wonder about the weight, when you say lightweight what do you mean? Like the same as a smartphone?
yes just as lightweight, maybe lighter